The Best Software for Perfect Tones: How to Color Grade Easily
Color grading puts that additional sprinkle on images and videos, offering normal visuals an extra layer of cinematic magnificence. It adjusts colors, contrast, and tones to create a mood or ambiance. Multiple tools exist, so carefully choose your software to achieve the perfect tones. Some options would include DaVinci Resolve and Lightroom. While how to color grade in DaVinci Resolve and Lightroom is a solid place to start for video edits with professional-level quality, this is what we want to explore in this guide, color grading basics, step-by-step methods that ensure looks gorgeous without compromising ease.
Contents:
Part 1. What is Color Grading
To give a picture or video a certain look or feel, color grading is the process of altering and modifying the colors within the image. A mood is created by adjusting colors, saturation, contrast, shadows, and highlights. This is also applied to images in photography, film, and to digital media content creation itself to give these more cinematic or artistic style.
Color Correcting vs. Color Grading
You can mix Color correction and color grading , but they are two different steps in the post-production process:
• Color Correction is the part where you address and correct problems like exposure, white balance, and color offset so that the image looks natural and true to life. It guarantees that the way colors look is the same as in reality.
• You can level up the images and videos through Color Grading.
For example, a photo of a sunset might be color-corrected to balance brightness and eliminate unwanted color casts. However, it can also be color-graded to give richer oranges and purples, lending a more dramatic quality to the final product. You can achieve stunning results from professionals who color-grade images using DaVinci Resolve and Lightroom software.
Part 2. How to Color Grade
Color grading is a fundamental technique used to improve photos and videos by changing colors, contrast, and tones to create a certain look. Learning how to color grade can go a long way toward making your visuals look professional. The first two ways are DaVinci Resolve and Lightroom.
Method 1. DaVinci Resolve
Hence, DaVinci Resolve is the finest video editing software for color grading among filmmakers and photographers. It has powerful editing tools for adjusting color, contrast, and brightness to give it a slick, cinematic look. Knowing the best technique to shade-move photos in DaVinci Resolve can turn bad images into beautiful masterpieces. DaVinci Resolve is a lovely software that quickly looks good in stills & films. Thanks to color wheels, curves, nodes, and LUTs, one can add to inputs and outputs to make extremely precise color corrections. Here’s how to color grade photos using DaVinci Resolve.
Steps to Color Grade Photos in DaVinci Resolve
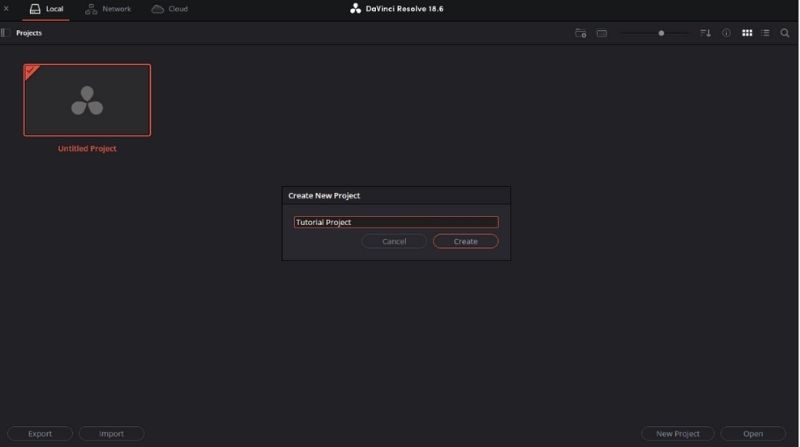
Step 1. Run the DaVinci Resolve and create a New Project or Untitled Project.
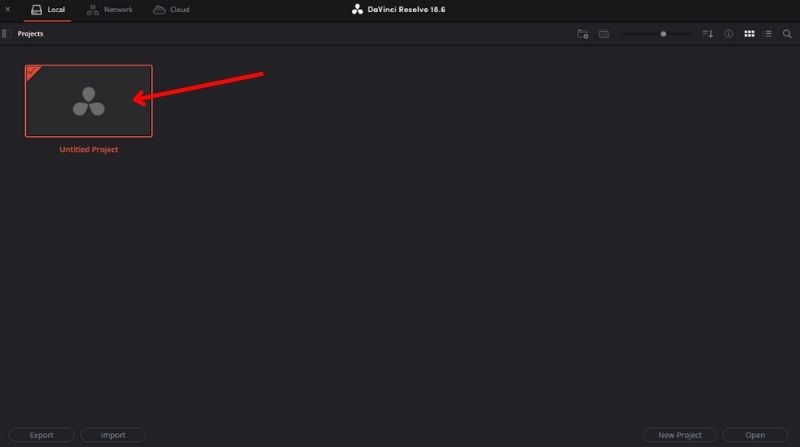
Step 2. Hit Create after you enter your project name.
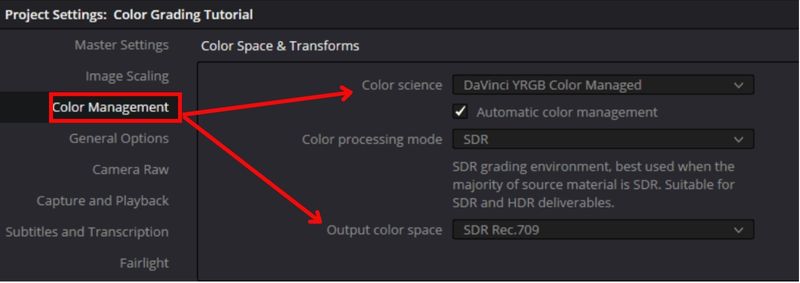
Step 3. Find Color Management, then choose Project Settings. After selecting DaVinci Color Managed (YRGB), input SDR Rec.709.
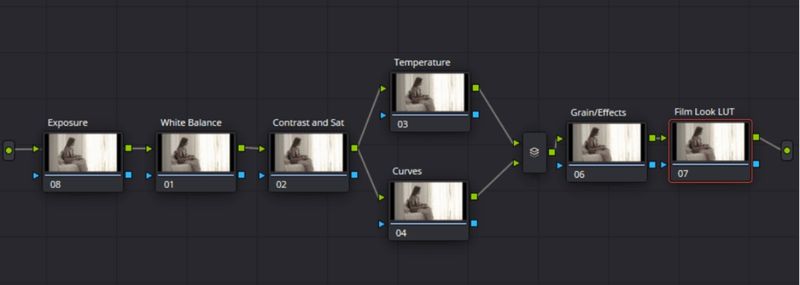
Step 4. Hit the Nodes to start the node tree, and then use the Alt + S keyboard shortcut to add serial nodes. We employ parallel nodes for temperature and curves to apply several color corrections without their compounding on top of one another.
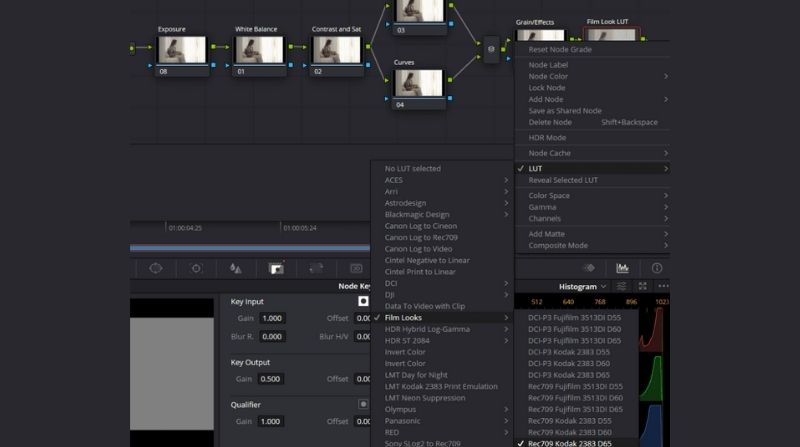
Step 5. You can import and apply a LUT to your video by right-clicking the Film LUT node and choosing LUTs. Choose the LUT that works best for your footage. (optional)
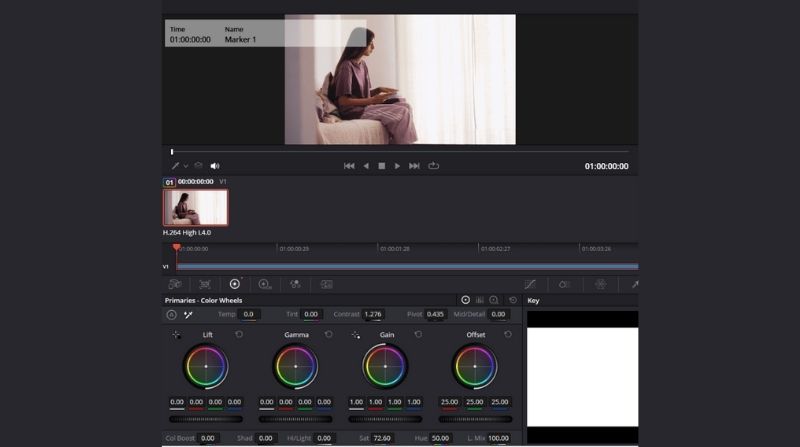
Step 6. The next step is to ensure the appropriate exposure. After choosing your Exposure node, the Primaries—Color Wheels will open. Adjust the exposure bars until you are satisfied with the outcome. Move the slider beneath the Offset wheel, to begin with global exposure. Next, change the exposures for Lift, Gamma, and Gain, if necessary, to adjust specific areas of the picture.
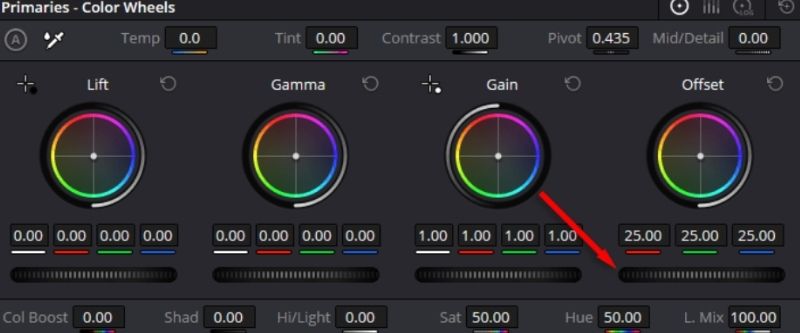
Step 7. Open the Primaries—Color Wheels tab after selecting the Balance node. Each wheel impacts the colors in various image areas, much like exposure. Move the Offset wheel in any direction after selecting the circle in the middle. Your image's general color will change.
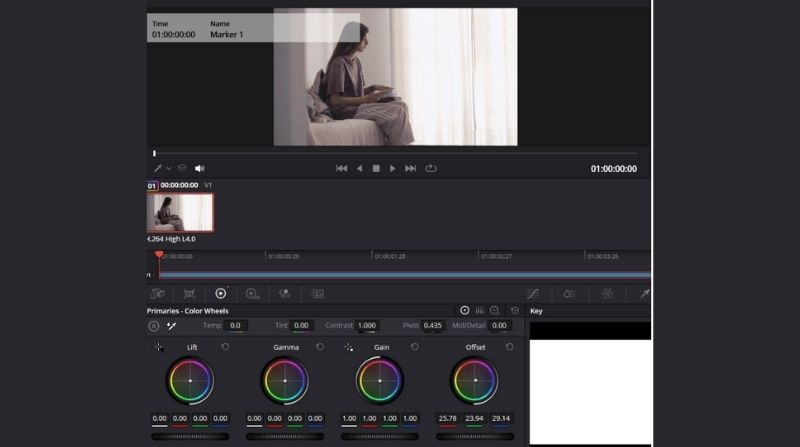
Step 8. Now that you have that out of the way, you need to make your footage more vibrant by increasing the contrast and saturation. Adjust the Contrast and Saturation sliders until you are satisfied with the outcome after selecting Primaries – Color Wheels.
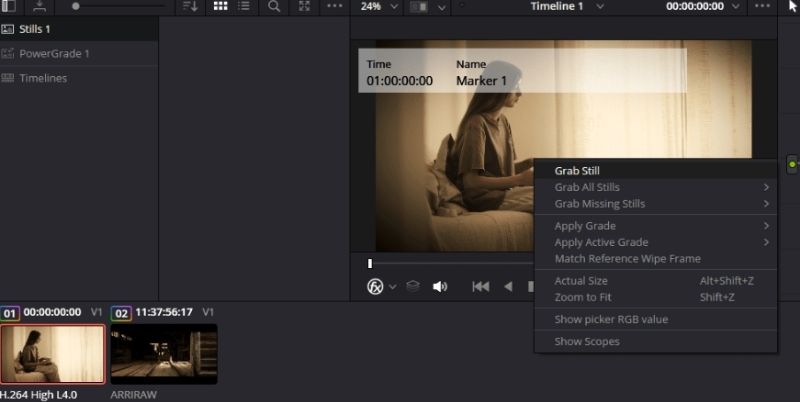
Step 9. Select Stills Album to save the color grade as a DaVinci Resolve color grading preset. Right-click on the video and choose Grab Still.
These steps will teach you how to color grade photos in DaVinci Resolve. With a little experience, you’ll create amazing, high-quality images that stand out.
Method 2. Lightroom
Lightroom is one of the best options if you’re looking for a simple and effective tool to improve your photos. It’s easy to use but powerful enough to make your images look professional and polished. While DaVinci Resolve is a video editing application, Lightroom is made for photographers, making it an amazing choice for newbies and experts. Controls for HSL sliders, toning curves, and color grading photos in Lightroom enable you to reshape your photos' hues, highlights, and shadows, along with their general tone. Pairing your pictures with a color grading tutorial in Lightroom will take you closer to getting where you want to be with minor tweaks. We service step by step.
Steps to Color Grade Photos in Lightroom
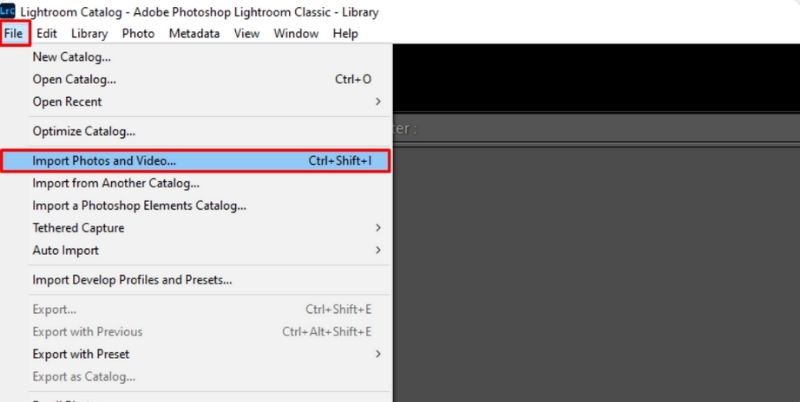
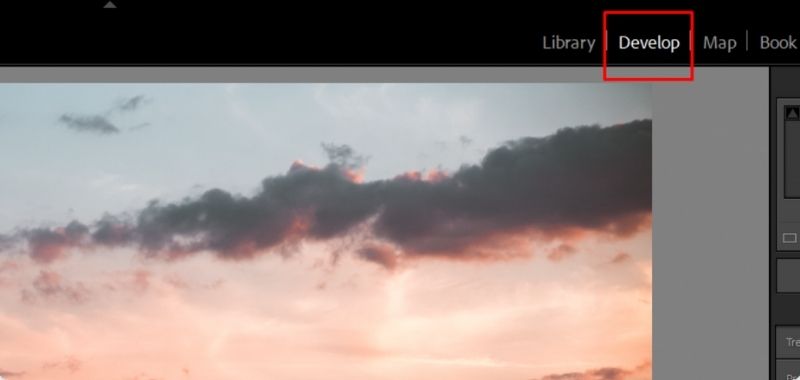
Step 1. Launch Lightroom and select the Library module. Click Import Photos and Videos you want to edit.
Step 2. Import and then move into the Develop module for color grading.
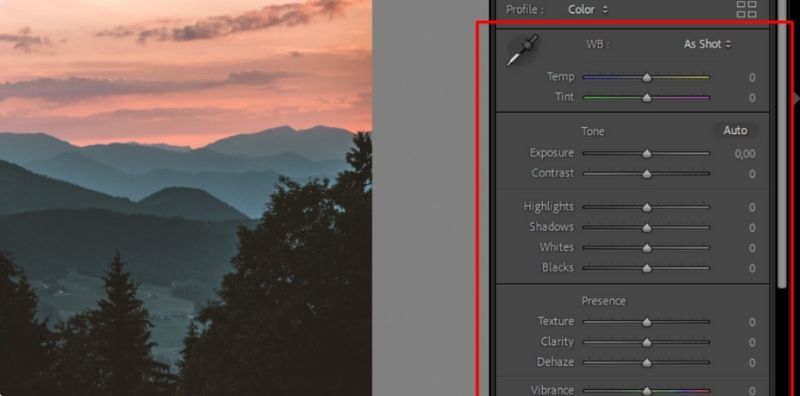
Step 3. In the Basic panel, balance the image and set the Exposure, Contrast, Highlights, Shadows, Whites, and Blacks.
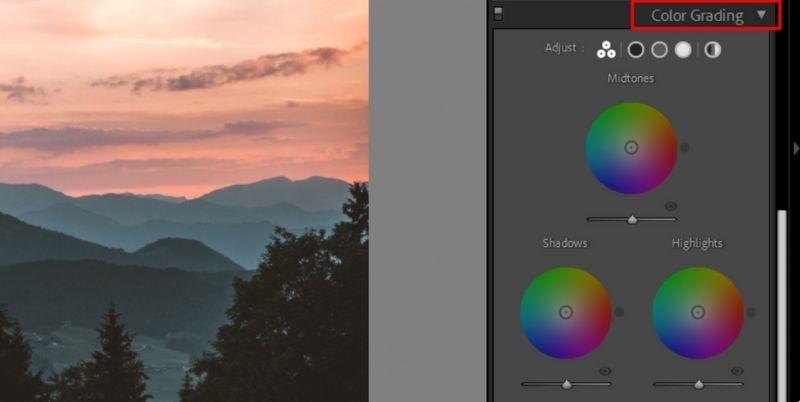
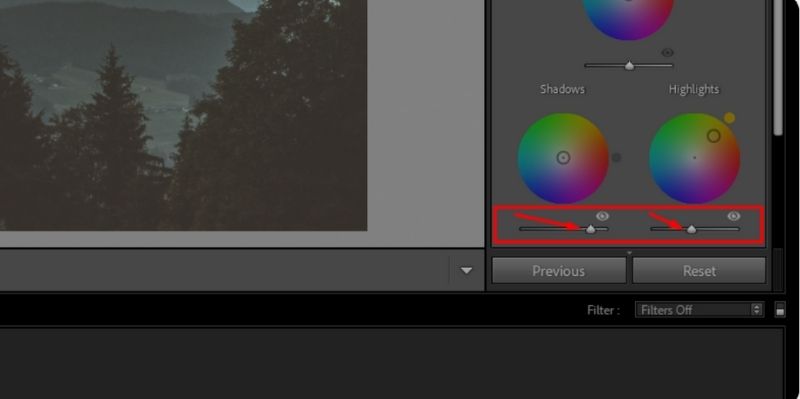
Step 4. Choose the color grading tool from the Develop panel. Scroll until you find it, and click on the color grading tab.
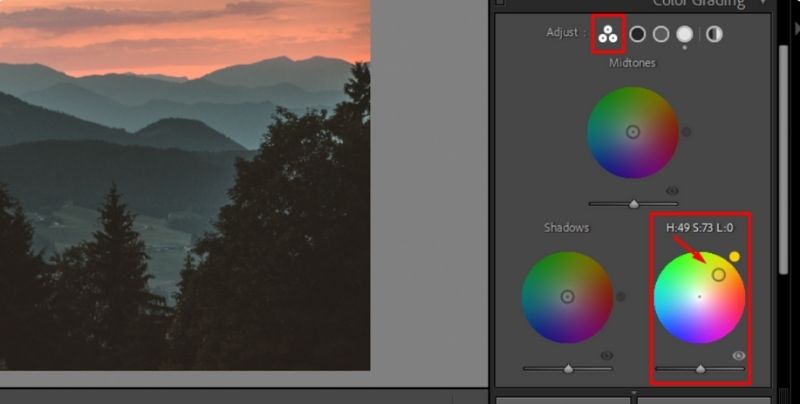
Step 5. Explore the Color wheels. Use your mouse to drag the handle, and place a small circle in the middle of each wheel. By Scrolling the handle in circles, the Hue (color shade) will change. Every color wheel has a slider at the bottom to adjust the luminance, and the handle can be pulled from the center to the edge to change the saturation.
Step 6. Play with the Blending and Balance sliders to get the desired effect.
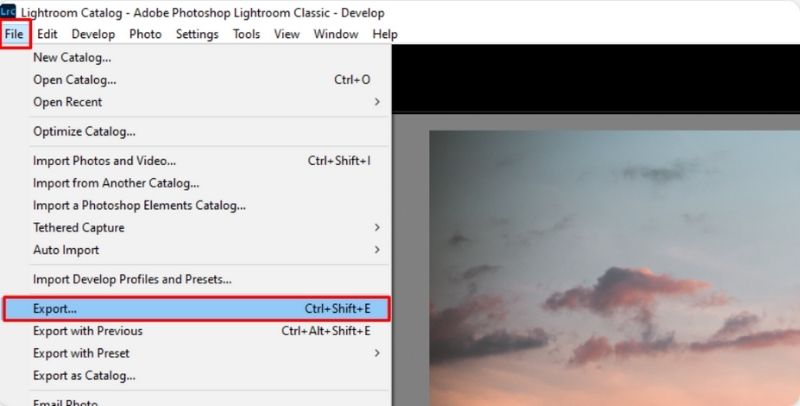
Step 7. Use a preset or adjust the colors yourself for a more unique look. If you are okay with color grading, click Export to save your edited photo.
And that’s it! Lightroom features simple yet powerful color grading tools that help you quickly turn your photos into professional-quality images. It enables you to develop your signature style with minor alterations.
Part 3. The Ultimate Color Grading Tool- Picwand AI Photo Restoration
Picwand AI Photo Restoration is a quick and easy tool for improving photos. While traditional editors involve much manual work, Picwand AI leverages artificial intelligence to restore automatically, color grade, and enhance images with one click. It streamlines the whole and is excellent for amateurs and professionals alike.
How to Use Picwand AI to Restore Photos and Color Grade Them
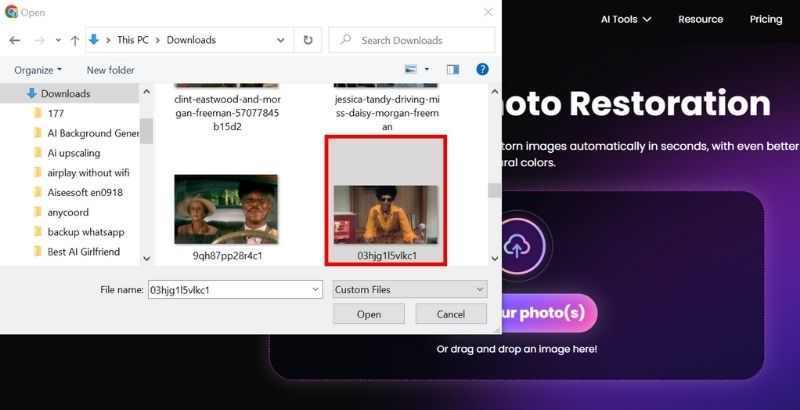
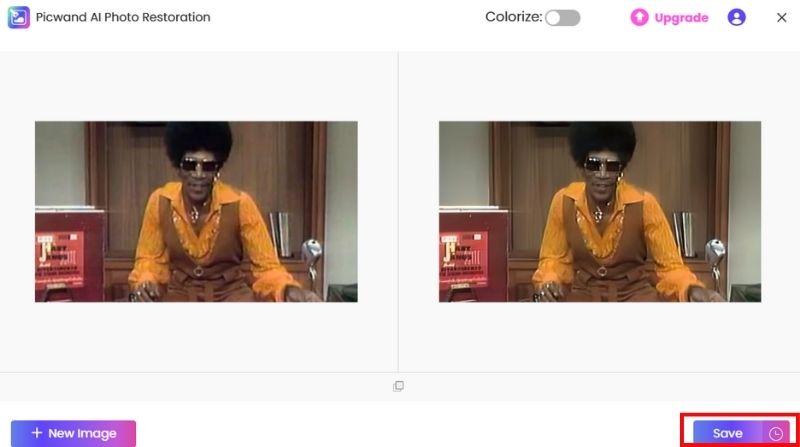
Step 1. Visit the Picwand AI Photo Restoration site and click Add Your Photo to choose the photo you want to restore or enhance.
Step 2. In a few seconds, the tool will automatically improve the picture and do the color grading.
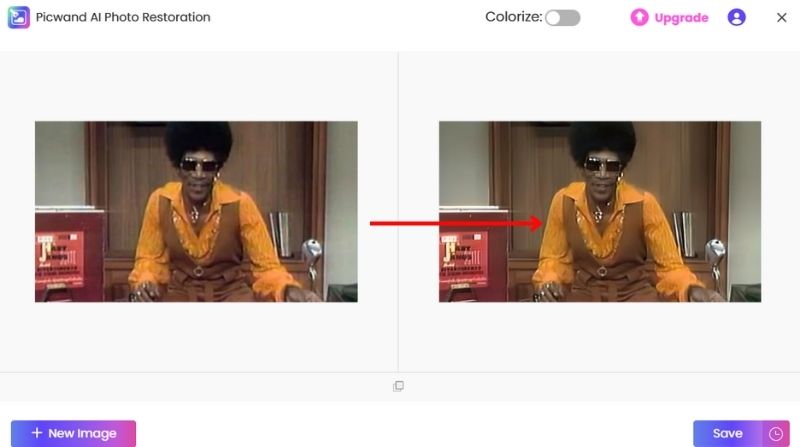
Step 3. When satisfied with the result, click Save to restore and color-graded image.
You do not need to have elaborate editing skills to get professional outcome from Picwand AI Photo Restoration. With this powerful tool you can color grade and restore images in a few clicks. It is fast and efficient, the best solution for every editing necessity.
Part 4. FAQs about Color Grade
How do I learn color grading as a beginner?
Start by learning basic adjustments such as White Balance, Which Adjusts temperature and tint; contrast and exposure, Which Enhances brightness and depth; HSL Sliders, Which Modify specific colors; and Curves and LUTs, Which Add advanced stylization.
What is an LUT, and how can it assist with color grading?
LUTs are filters of color grading done beforehand that you can apply to an image or video to achieve a certain look instantly! They help save time and keep color tones consistent across multiple photos or videos.
Can AI tools help with color grading?
Tools like Picwand AI Photo Restoration, powered by AI, can make picture high quality, enhance and color grade the image with ease in one click, which would have taken a beginner a lot of time to achieve with manual adjustments.
How long does it take to color grade an image or video?
It depends on the complexity of the edits. AI tools like Picwand AI can do it in seconds, while manual color grading in Lightroom or DaVinci Resolve may take a few minutes to an hour.
How do I maintain skin tones while color grading?
To keep skin tones natural, use the HSL panel to adjust orange/red tones, avoid oversaturating colors that affect the skin, and use masks or selective color grading to target only the background.
Conclusion
Color Grading can completely change images and films into those that fill the vision with mood, style, and general harmony of color. The most important concept is the difference between color correction and color grading for setting the desired look. Lightroom and DaVinci Resolve allow you to manually adjust your images extensively to enhance your to-be-processed image. If you want a more efficient and simpler way, Picwand AI Photo Restoration is another AI-based solution. Once you know how to color grade, You will discover how to use vibrant colors, dramatic tones, or any other imaginative approach to turn ordinary photos into breathtaking photographs. Master color grading so you can take your editing to the next level!
AI Picwand - Anyone Can be A Magician
Get Started for Free