Best Ways for Old Photo Digitization: Convert, Store, and Restore
Have old printed photos from years past in your closet in boxes or in albums that have been collecting dust? If yes, there is no better time to revive those memories through old photo digitization . However, with today’s technology, turning physical pictures into digital ones is easier than ever! Whether you do it with a photo-scanning app like Google PhotoScan, the camera on your phone, or through a professional photo-to-digital service, there are simple options for preserving your cherished memories. But don’t just scan. Use impactful AI tools like Picwand to return those images to their original glory. In this article, we will lead you the best methods to get your old photos digitized and enhanced for preserving and sharing. Let’s get started!
Contents:
Part 1. How Do I Make Old Photo Digitization
One of the most important and meaningful steps is converting photos to digital pictures when protecting your memories. If you’ve still got a stack of old photo prints stacked away in a drawer somewhere, digitizing them both protects them from losing vibrancy and being damaged and will let you be able to order, share, and keep them safely. You can start to do this in simple and powerful ways. In this section, we’ll cover methods for old photo digitization using scanning apps, your phone camera, or trusted photo-to-digital services to help you choose the option that will work best for your needs. Here’s how to convert those treasured prints into enduring digital keepsakes.
Method 1. Google Photo Scan
One of the most straightforward methods for anyone asking how to convert old photos to digital is photo-scanning apps. These apps allow you to take pictures of your prints and crop, rotate, and adjust them before saving them to your phone or the cloud (like Google Drive). Using this program, you can convert any printed image from your phone into high-resolution digital files. One popular application is Google PhotoScan, which automatically detects edges and removes glare to enhance the image for the clearest possible image.
Here’s how to do it:
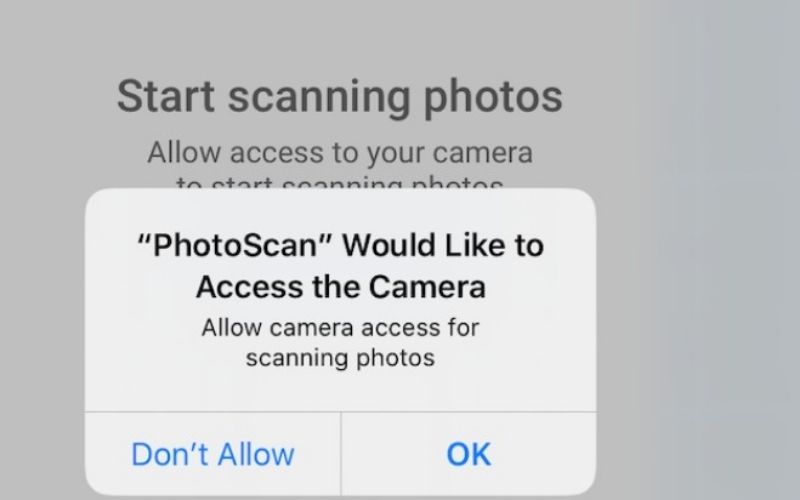
Step 1. Download the Google PhotoScan on your mobile phone.

Step 2. You can enable it to authorize access to your storage and camera. Allow these to proceed. Place your printed photo face-down on a table or desk. Ensure that the lighting is right and that no shadows obscure the image.
Step 3. Using Google PhotoScan, align the entire photo inside the frame on your screen. Do not crop the edges.
Step 4. Tap the shutter button. After selecting the app, the prompt will move your phone to four small dots. This allows the app to capture more angles and minimize glare.
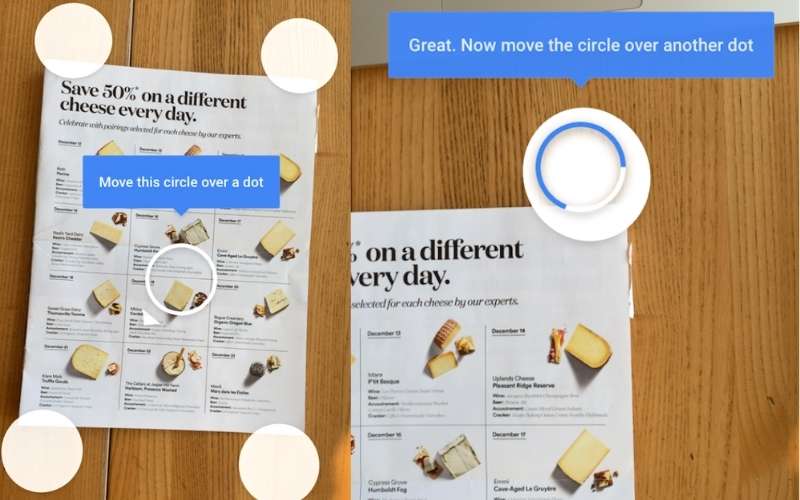
Step 5. Using Google PhotoScan, align the entire photo inside the frame on your screen. Do not crop the edges.
Step 6. Tap the shutter button. After selecting the app, the prompt will move your phone to four small dots. This allows the app to capture more angles and minimize glare.

Step 7. You can rename the file, organize it into folders, or edit it further using basic photo editing tools. (optional)However, it might not be a guaranteed success to digitize your photos without error. Sometimes, you might find that your photos become corrupted after digitization, so you have to repair those corrupted photos to view them directly on digital devices.
Pro Tip: Clean the photo before scanning, and try to scan in daylight near a window for the best results!
Method 2. Phone Camera
One of the most straightforward and immediate methods of converting these photos into digital pictures without obtaining a specialist kit is to photograph the images using your phone camera.
How to Shoot a Photo of a Photo That Looks Good
Step 1. Use a soft fabric to wipe away dust or fingerprints from the surface of your old photo that may be detrimental to the image quality.
Step 2. Lay the photo on a flat, solid-colored surface (a white or neutral table, etc.). Be in a bright room or a room with natural light near a window. Avoid overhead lighting, which creates glare and harsh shadows.
Step 3. Start your phone’s native camera app. Keep the camera lens clean so the shot is clear. To avoid distortion, hold the phone parallel to the photo (not at an angle). Hold your phone steady in both hands.
Step 4. Click on the image area on your screen to bring focus. Your phone might adjust brightness automatically, but you can always increase or decrease exposure.
Step 5. If you’re satisfied with everything, take a photo. Photograph a few times since one may come out blurry or uneven.
Step 6. Crop the edges of the image, increase brightness and contrast, and apply filters if you want a cleaner look using your phone’s photo editing tools. (optional)
Step 7. Download the final image to your gallery and upload it to cloud storage to cross-protect your digital copy.
Pro Tip: If you have a tripod or stand to keep your phone steady and level while taking the shot, you’re doing great.
Method 3. ScanMyPhotos - Trusted Photo to Digital Service
Suppose you do not know how to scan physical photos to digital or want quality assistance without the DIY hassle. In that case, ScanMyPhotos is a trustworthy photo to digital service you can count on. They’ve scanned over a billion pictures and are known for fast turnarounds and pro-level results. Ideal for those who’d rather have all their scanning done in bulk as opposed to membership fees and the potential to damage precious memories, it’s about as close to perfect as you can get.
How to Use ScanMyPhotos
Step 1. Visit ScanMyPhotos and select the Digital Photo Scanning service.
Step 2. You choose a box size according to the number of photos you want converted. The prepaid box provides shipping instructions for both directions.

Step 3. During pack out, sort your photos by size or event and securely pack them with the materials provided.
Step 4. You can drop off the prepaid box at your local courier or schedule a pick-up. Once you receive the photos, ScanMyPhotos will scan them.
Step 5. The resolution of the scanned photos is up to 600 DPI. You can also choose photo restoration or image enhancements. Once digitized, you can store those memories, print them, or share them, and you can back them up for peace of mind. If your old photos are blurry, you can also use AI to improve image quality .
Part 2. Restore Your Photos Before Storage with Picwand AI Restoration
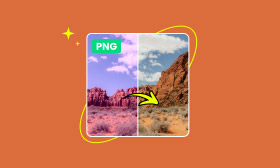
But before you archive your digitized, treasured memories, take some time to resurrect them. Replace old and deteriorated images with Picwand AI Restoration , regardless of whether they have decayed, scratched, faded, or lost their former crispness. This amazing online tool powered by artificial intelligence can automatically restore damaged or old-looking photos without requiring you to have any post-editing skills. With intelligent filters and deep-learning technology, Picwand enhances quality, clarity, and color balance in seconds.
Main Features
• Automatically identifies deterioration and enhances old or fuzzy images
• Restores lost color, bringing images back to life with fresh, vibrant colors.
• Wipes away scratches, stains, or spots in one touch.
• No download is necessary, and it works in your browser.
• View side-by-side before and after versions instantly.
• Protection is permanent.
Steps to Use Picwand AI Restoration
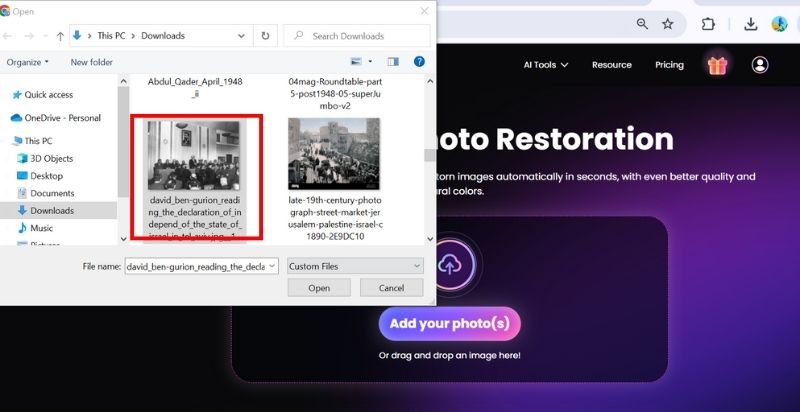
Step 1. Use the search bar to navigate to Picwand AI Restoration. Then, choose the image you want to access from your device.
Step 2. If so, Picwand AI will automatically improve your photo, making it blurry, causing damage and damage, and restoring color. The improvements ensure they are ideal for your requirements.
Step 3. Colorize can apply a touch to your photo, particularly in restoring old black-and-white photos.
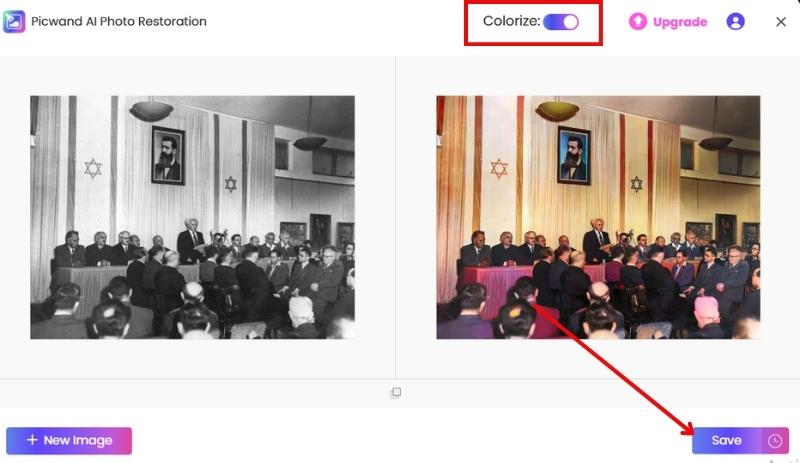
Step 4. Save your enhanced photo, which can be kept long-term or printed out.
Whether creating digital backups or curating family albums, Picwand AI Restoration ensures your precious memories are as sharp and stunning as the moments they document.
Part 3. FAQs about Old Photo Digitization
How can I store my digitized photos safely?
To ensure long-term preservation, save copies on external hard drives or USBs. Use cloud storage (Google Drive, Dropbox, iCloud). Keep multiple backups in different locations.
How long does it take to digitize an old photo collection?
It depends on the method you choose. A photo scanner can take a few minutes per photo, while photo-scanning apps are faster and may require additional editing. Professional services can handle bulk digitization efficiently.
What is the fastest way to digitize a large number of old photos?
Use an automatic feed scanner. Hire a professional photo digitization service. Scan in batches and enhance them with an AI tool like Picwand AI Restoration.
Conclusion
Digitizing old photos is the best way to keep and preserve your precious memories for generations. Converting photos to digital pictures will protect them from physical damage, fading, and loss. Digital also makes organizing, sharing, and reliving your favorite moments easy. You can also enhance your photos with Picwand AI Restoration before storing them, restoring faded colors and scratches and bringing them back to life. When paired with AI-powered restoration, your memories will look their best while safely stored in digital form.


AI Picwand - Anyone Can be A Magician
Get Started for Free