Complete Tutorial on How to Smooth Skin in DxO PhotoLab 6 and Online
Sometimes, a great photo just needs a little polish, especially when it comes to skin tone. If you’ve been curious about how to smooth skin in DxO PhotoLab 6, this guide provides a simple walkthrough of the process, with clear steps, so that you can retouch your photos with confidence. We’ll start with how to Smooth Skin in DxO PhotoLab 6, where you’ll learn the basic steps to get smooth, natural-looking skin using the software. After that, we’ll move to the best alternative to DxO PhotoLab 6, where we’ll introduce Picwand AI skin Retouching. We’ll cover its features, steps, pros, and even share a final verdict so you can decide which method suits your editing style best. By the end, you’ll have two great options in your toolkit, a detailed way through DxO PhotoLab 6 and a quick, AI-powered shortcut.
Contents:
Part 1. How to Smooth Skin in DxO PhotoLab 6
Editing portraits often means paying attention to skin tones and textures, and DxO PhotoLab 6.0 has some powerful tools that make this process easier. Whether you want to reduce blemishes or create a polished, magazine-style look subtly, here are the complete steps you can follow to smooth skin naturally.
Step 1. Open DxO PhotoLab 6.0 and import your photo by dragging it into the workspace or selecting it from your library.
Step 2. Click on the Customize tab. This is where you’ll find all the editing tools, including retouching and local adjustments.
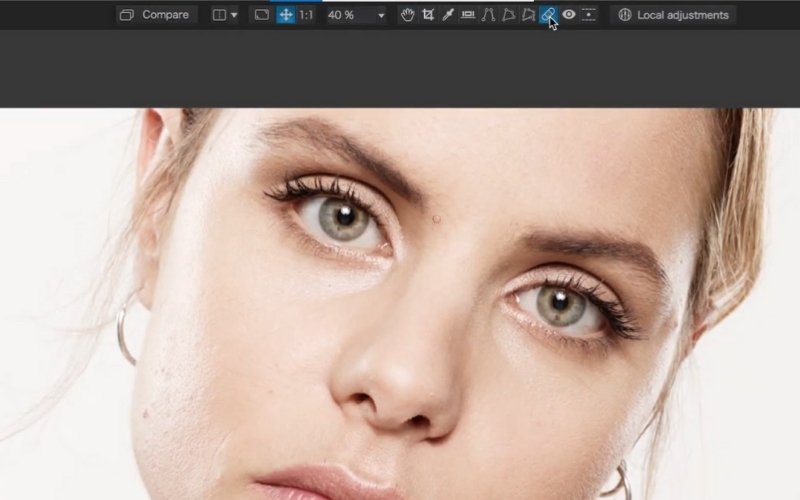
Step 3. Select the Repair Tool (looks like a band-aid icon). Click on small imperfections such as pimples, spots, or scars, and the tool automatically blends the area with the surrounding skin.
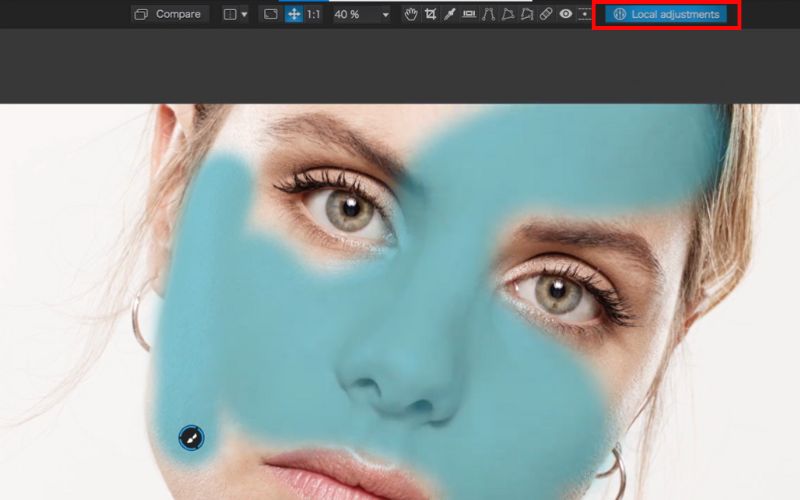
Step 4. Click on the Local Adjustments tool. Use the Control Points or Brush Tool to target just the skin area. Control points let you select skin tones easily, and the brush tool allows for more manual painting of the area.
Step 5. Inside the Local Adjustments panel, reduce the Microcontrast slider. By softening the pores and fine details, this step helps to make the skin look smoother without looking fake.
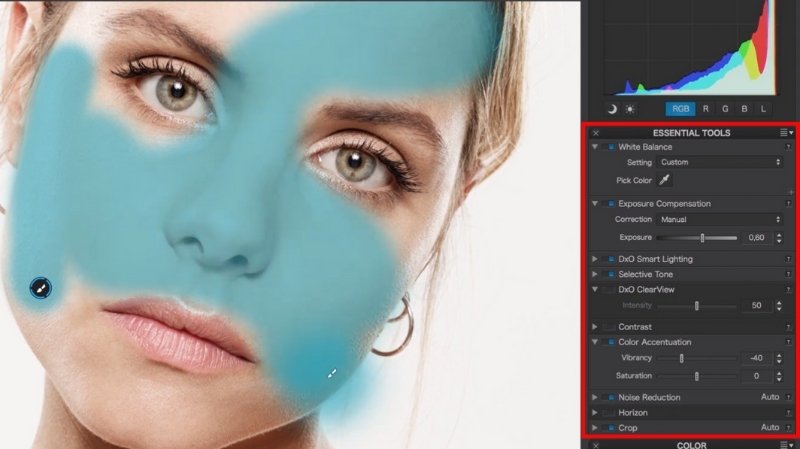
Step 6. Lower the Fine Contrast slider to soften details further. Be careful not to overdo it, or the skin might look too plasticky. You can also adjust the brightness and exposure for smoother skin.
Reminder: Avoid using ClearView Plus on skin areas. It’s best for landscapes, not portraits.
Step 7. Use the HSL Color Wheel to adjust skin tones slightly. Reduce redness or uneven tones by targeting the red/orange sliders. (optional)
Step 8. Open the Tone Curve panel. Slightly lift the shadows to create a softer, more flattering effect on skin. (optional)
Step 9. In high ISO photos, skin may look grainy. Use DxO’s powerful DeepPRIME noise reduction to smooth out the skin without losing detail.
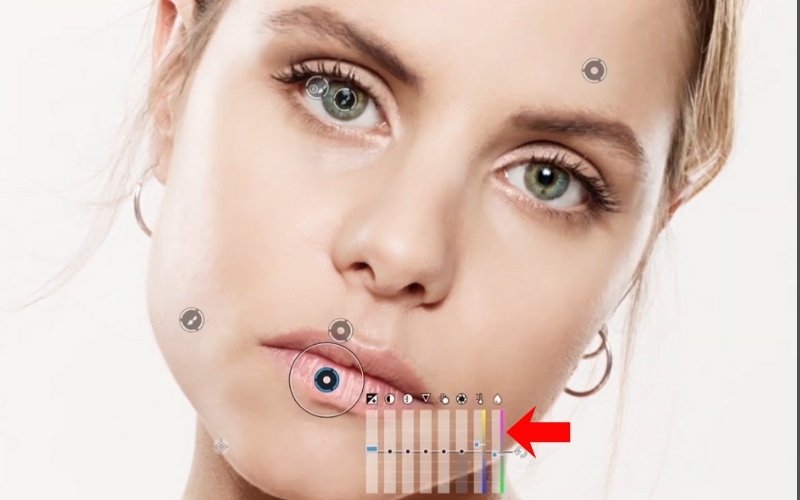
Step 10. Select the Control Point tool. Click on an area of the skin you want to smooth. DxO will automatically detect similar tones in that region. Adjust the radius of the Control Point to cover the desired skin area.
Step 11. Zoom in to check for any uneven spots. Use local adjustments again if certain areas need more smoothing. Compare the before/after view to ensure the result looks natural and save it.
Tip: The key with skin retouching in DxO PhotoLab 6.0 is moderation. Use subtle adjustments so the skin looks smooth but still keeps its natural texture. Over-smoothing can make portraits look artificial.
Part 2. Best Alternative to DxO PhotoLab 6
DxO PhotoLab 6 has a multitude of professional tools for customization and professional editing. For those new to photo retouch, it can seem overwhelming. Additionally, there are days when you simply don’t have the time to sort through all of the sliders and adjustments. This is when Picwand AI Skin Retouching is helpful. It’s an online skin smoothing AI tool that will fix skin and enhance portraits in just a few clicks with no software downloads or steep learning curve.
Key Features
• Automatically smooths skin without losing the texture.
• No learning curve on fancy editing tools.
• It can be used online, meaning no download is required.
• Perfect for last-minute touch-ups.
• Smooths skin without making it look too artificially airbrushed.
Pros
- Easily accessible, especially for beginners.
- Instant results without any learning curve.
- No software installations.
- Beautifully natural-looking skin smoothing without over-editing it.
- Saves a considerable portion of time compared to manual touch-ups.
Steps to Use Picwand AI for Skin Retouching
Step 1. Click the link below to access Picwand AI Skin Retouching.
Step 2. Click Upload an Image to upload the image you wish to modify.

Step 3. Let Picwand AI Skin Retouching process your photo. It only takes a few seconds. Click Apply after.
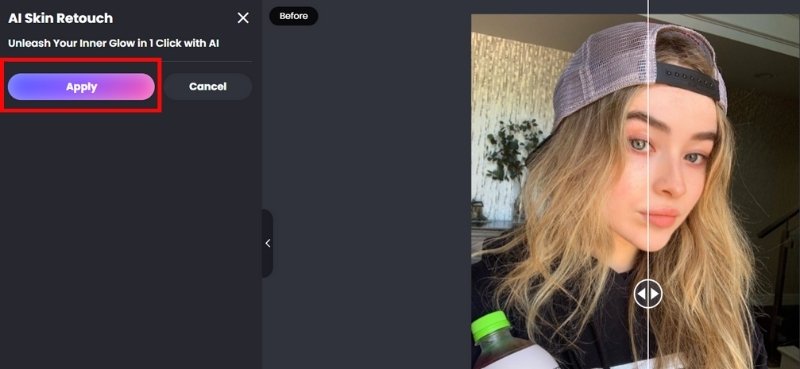
Step 4. Review the result, you can move the scroll arrow left and right. If you’re satisfied, download the edited photo immediately.

Verdict
If you want smooth skin without the manual editing work, Picwand AI Skin Retouching is your new best skin retouch tool! You won’t get the same depth of control as you do in DxO PhotoLab 6, but for quick edits that still look professional, you can’t do much better than this. It’s easy to use, fast, and dependable for someone who doesn’t want to spend hours adjusting settings.
Part 3. FAQs about Smooth Skin in DxO Photolab 6
What are Control Points used for in skin retouching?
Control Points let you target skin tones precisely, so you can reduce texture on the skin without affecting details like eyes, lips, or hair.
Can I smooth skin on multiple photos at once?
Yes, you can copy your adjustments in DxO and apply them to multiple photos, which is useful for batch editing portraits.
Is DxO PhotoLab 6 better than online AI tools for smoothing skin?
It varies. While online AI tools like Picwand are quicker and simpler for quick touch-ups, DxO offers you more control and professional-quality edits.
Does DxO PhotoLab 6 have automatic portrait retouching?
Not fully automatic, but its Control Points and Repair Tool make skin retouching much faster and more precise compared to manual masking.
What distinguishes Photoshop from DxO when it comes to skin retouching?
While DxO PhotoLab 6 concentrates on making quick adjustments using Control Points and ingenious tools, Photoshop skin retouching offers control at the pixel level. Photoshop is more complicated, but DxO is simpler for fast edits.
Conclusion
You've got yourself! Smoothing skin doesn't have to be difficult! Whether you love the detailed sliders you have in DxO PhotoLab 6.0 or you prefer the easy route using Picwand AI Skin Retouching, either way gets the job done for you. DxO is great if you'd like to have control of every slider and adjustment, while Picwand makes it easy to get a polished photo in seconds. Ultimately, it all depends on your approach and the amount of time you are willing to spend editing. Either way, you now have two tools to smooth your skin to make portraits look their best!
AI Picwand - Anyone Can be A Magician
Get Started for Free