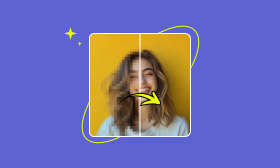
Quick Ways to Unpixelate an Image in Photoshop [Easy Hacks]
Pixelated images are a common issue many people encounter when working with photos. It occurs when an image loses detail, causing visible blocky patterns or jagged edges. In professional photography, pixelation can make images look unprofessional. For personal use, pixelation reduces image quality and clarity, making them less appealing. Fortunately, there are ways to fix pixelated images. In this post, you will learn how to unpixelate an image in Photoshop in two ways. We will help you improve the quality of your pixelated images effortlessly. This way, you can use them for your personal and professional projects.
Contents:
Part 1. What Causes Pixelated and Grainy Pictures
Pixelated and grainy pictures are a common frustration for photographers and editors. These issues occur when an image lacks enough visual data to display smooth details. This results in visible blocks (pixelation) or a rough, speckled texture (grains).
• Saving or exporting images multiple times in compressed formats can degrade their quality.
• Using a high ISO in low-light conditions can introduce digital noise, resulting in a grainy texture.
• When you enlarge a low-resolution photo beyond its original dimensions, individual pixels become visible as they stretch.
• Applying too much sharpening or excessive post-processing can result in unnatural textures and accentuate image imperfections.
• Insufficient or uneven lighting can cause noise and grain in photos. It is noticeable when the camera struggles to capture enough detail in dark or shadowy areas.
Part 2. How to Unpixelate an Image in Photoshop (2 Effective Ways)
Method 1. The Gaussian Blur
The Gaussian Blur is a blurring filter in Photoshop that softens an image. It applies a soft blur to blend the harsh pixel transitions, reducing detail and noise. The effect is achieved by averaging the surrounding pixels according to a Gaussian distribution.
Here’s how to make a picture unpixelated in Photoshop using the Gaussian Blur method:
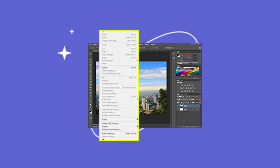
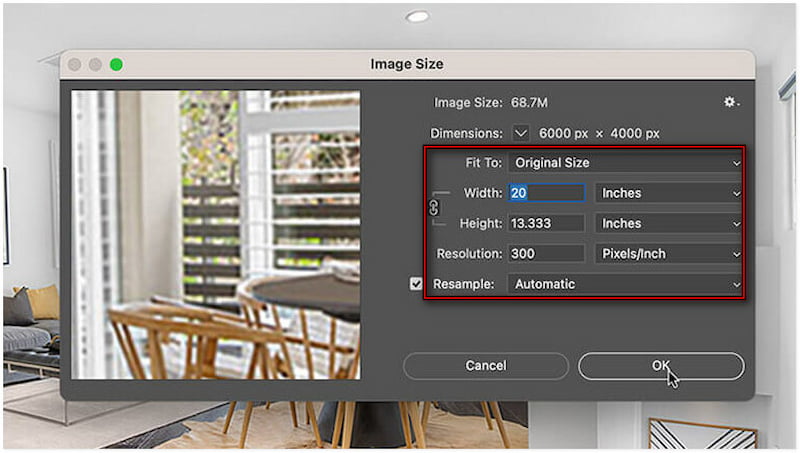
Step 1: Open the pixelated picture in Photoshop, proceed to the Image tab, and select Image Size. In the dialog box, enter higher values to increase its width and height.
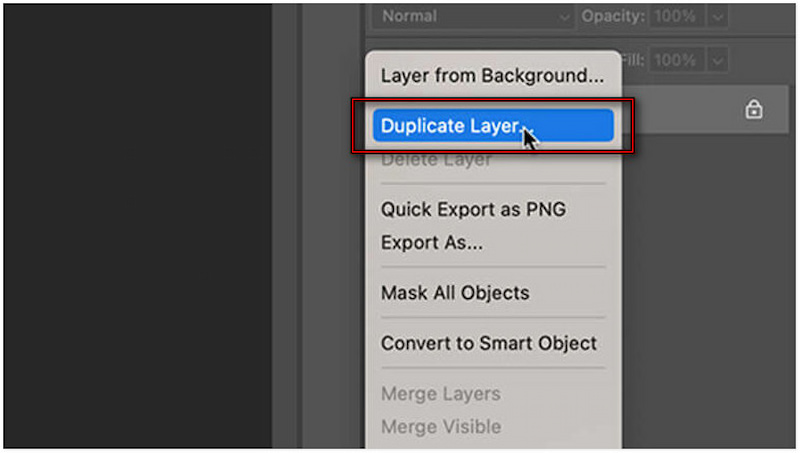
Step 2: Move to the Layer panel and select Duplicate Layer to create a copy. Select the duplicated layer so all the upcoming adjustments will apply to this layer only.

Step 3: Navigate to the Filter tab, click Blur, and select the Gaussian Blur option. In the Gaussian Blur window, adjust the Radius slider until the pixelation softens.
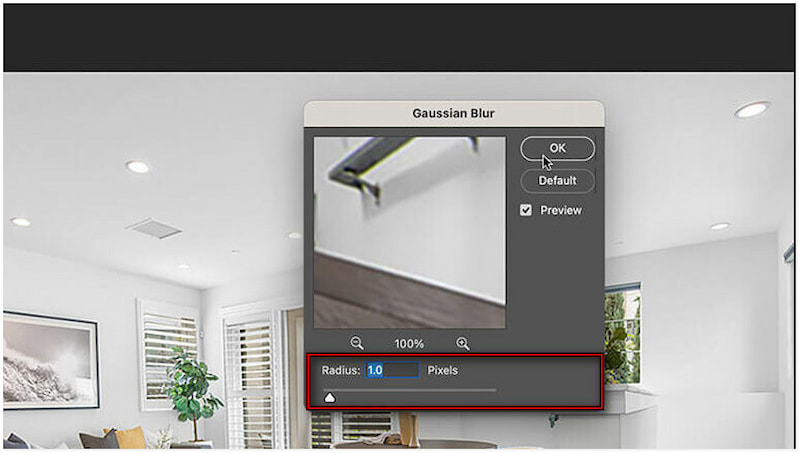
Creative Tip: A lower value applies a subtle blur, while higher values create a stronger smoothing effect.
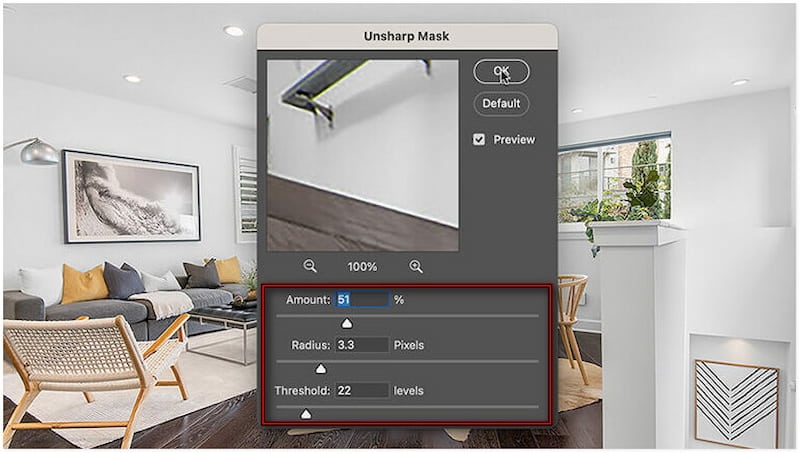
Step 4: Switch back to the Filter tab, click Sharpen, and select the Unsharp Mask option. Configure the Amount, Radius, and Threshold sliders until the image looks natural.
The Gaussian Blur method efficiently smooths out imperfections and pixelation in an image. However, overusing it can make the image appear too smooth or unnatural.
In the real estate market, blurry photos can slow down sales. This issue turns the demand for real estate photo enhancement into a necessity. This way, they can attract more buyers and help accelerate the sale process.
Method 2. The Sharpness Tool
The Sharpness Tool in Photoshop enhances the clarity and detail of an image. It increases the contrast along the edges of objects to make them crisp. It emphasizes differences between neighboring pixels, making textures and details appear more defined.
Here’s how to make pictures unpixelated in Photoshop with the Sharpness Tool method:
Step 1: In Photoshop, move to the Layers panel and select Duplicate Layer to preserve the original. Click the duplicated layer in the Layers panel to apply the Surface Blur effect.
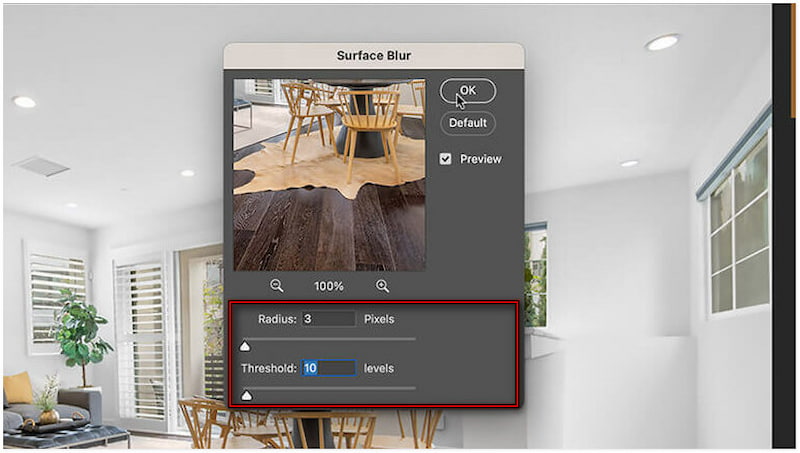
Step 2: Proceed to the Filter tab, select Blur, and click the Surface Blur option. Adjust the Radius and Threshold sliders to control the amount of blur applied.
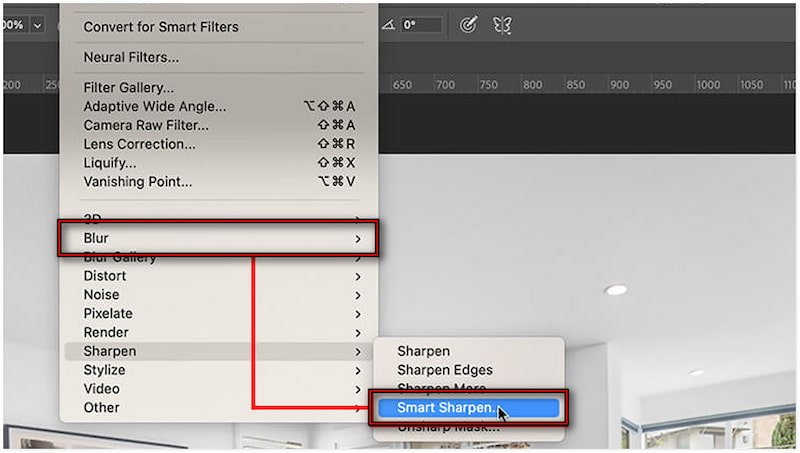
Step 3: Go back to the Filter tab, choose Blur, but this time click Smart Sharpen. Switch to the Layers panel and click Add Layer Mask to reveal or hide specific areas of the image.
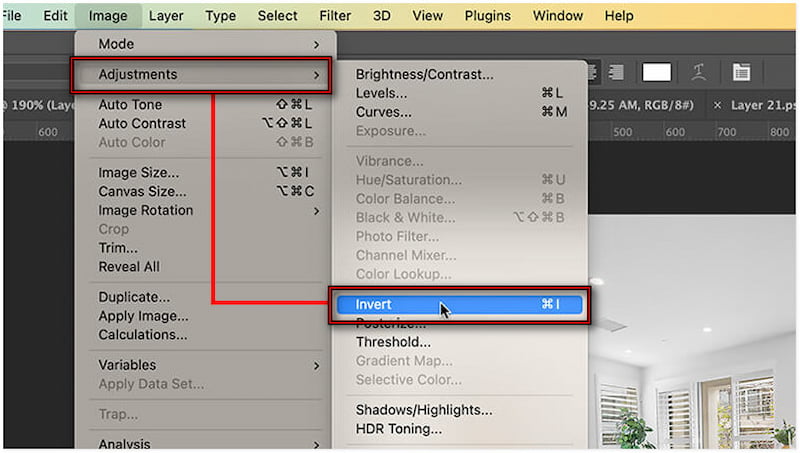
Step 4: Next, choose New Adjustment Layer in the Layers panel and click Invert to invert the mask. It hides the sharpening effect, allowing you to selectively paint it back onto desired areas.
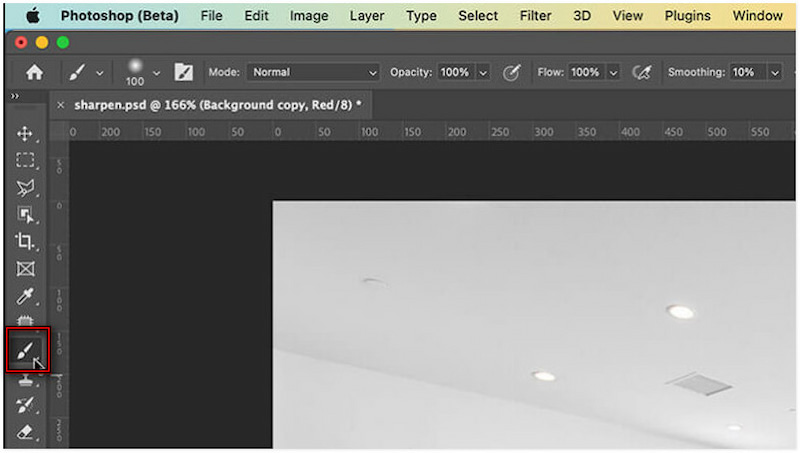
Step 5: Select the Brush Tool and paint over areas you want to appear sharper. You can adjust the brush’s opacity to gradually bring out details and reduce blurriness.
The Sharpness Tool method restores lost details after applying blur or smoothing effects. However, this method isn’t ideal for images with extreme pixelation or blur.
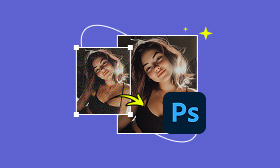
Part 3. Best Alternative to PS - Picwand AI Photo Enhancer
If you lack the time, skill, or patience to manually unpixelate images in Photoshop, don’t worry. Picwand AI Photo Enhancer offers a faster and simpler solution to make your pictures clearer. It utilizes recently developed AI enhancement algorithms to intelligently detect and correct issues such as pixelation, blur, and noise. Surprisingly, it can enlarge photos up to 8 times their original size, achieving resolutions of up to 4K. It supports multiple inputs, including JPG, JPEG, PNG, and more. It has become the go-to tool for many editors due to its accuracy and efficiency in restoring photo quality.
Why Choose Picwand AI Photo Enhancer:
• Reduces pixelation, blur, and noise without losing original detail or texture.
• Upscales images up to 8× their original size with resolutions reaching up to 4K.
• Uses the latest AI technology to analyze and enhance photos quickly and accurately.
• Automatically adjusts brightness, contrast, and color to improve dark or low-light photos.
Here’s how to unpixelate a photo in Photoshop alternative:
Step 1: Open your browser and reach the official Picwand AI Photo Enhancer page using the provided link. On the homepage, click Upload a Photo and select the pixelated image you want to enhance. The image will appear in the preview window, allowing you to see how it looks before enhancement.
Step 2: Under the Model Selection section, choose the General Model option, which handles most image types. Next, go to AI Image Upscaler and select your desired upscale level. Choose from 1×, 2×, 4×, 6×, or 8×, depending on your quality needs.
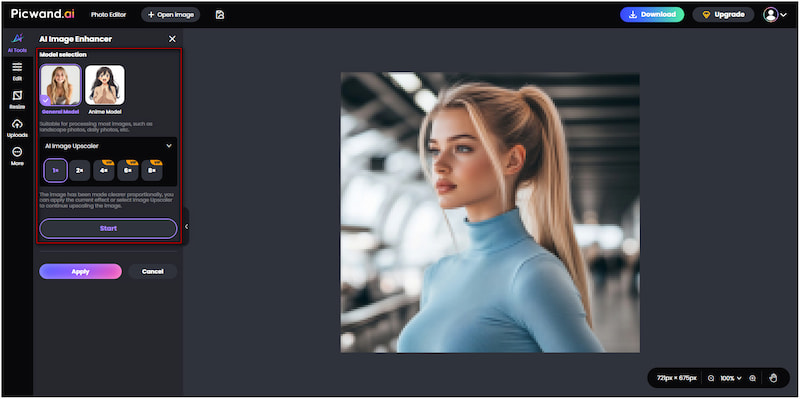
Step 3: Click Start to begin the AI enhancement process. Within seconds, it will automatically unpixelate the image and enhance its details. If you’re satisfied with the enhancement, click Apply to finalize the enhancement. Then, click Download to save your unpixelated image.
Picwand AI Photo Enhancer offers quick, automatic, and high-quality image enhancement. Unlike Photoshop, it enhances image quality up to 8 times its original size without manual adjustments. It simplifies the entire process with one-click AI enhancement.
Part 4. FAQs About Unpixelating Images in Photoshop
Does unpixelating increase image quality?
Yes, it can improve image quality. However, it cannot actually restore the lost data or maintain the original quality. This process only enhances the perceived quality by refining colors and blending details.
Can you unpixelate a censored photo?
No, you cannot unpixelate a censored photo because censoring is an irreversible process. Any attempt to restore such images can only make guesses, not reveal the true original image.
Can you sharpen a pixelated image?
Yes, you can sharpen a pixelated image using Photoshop’s Sharpness Tool. For a much simpler approach, use the Picwand AI Photo Enhancer to automate the sharpening process.
Conclusion
Pixelated images can detract from both personal and professional photos, making them difficult to appreciate. Thankfully, you can use Gaussian Blur and the Sharpness Tool to unpixelate an image in Photoshop. With these, you can effectively enhance your images, making them look sharper, cleaner, and appealing. However, if you’re looking for an easier and faster solution, Picwand AI Photo Enhancer is an excellent alternative. Its advanced AI algorithms automatically unpixelate, denoise, and upscale your images in seconds.
AI Picwand - Anyone Can be A Magician
Get Started for Free