How to Remove Background from a PNG Image Quickly and Simply
We believe that you must have taken good photos in your daily life but had to give them up because of the messy background. But now there is a great solution so you don’t have to give up these photos! This article will mainly focus on how to delete the background from PNG images with 5 tools. These tools make it easy for you to get perfect photos without cluttered backgrounds. Just keep reading to know more details if you are interested!

Part 1. What is PNG
PNG was created in 1996 by the PNG Development Group to improve the Graphics Interchange Format and create a better image format than GIF.
The full name of it is Portable Network Graphics, a versatile image format. It is a raster graphics file format commonly used on the Internet. The reason for this is that it has a fixed number of pixels and can be compressed without loss of data and quality. This also makes it suitable for processing images that require high quality.
Moreover, PNG is useful for processing images with transparent or semi-transparent backgrounds and placing logos on other backgrounds. This feature has made it a favorite among many designers.
Part 2. How to Erase the Background to Create a PNG
In this section, five ways to delete PNG backgrounds, including Picwand AI Photo Cutout, Pixelcut, Remover.bg, GIMP and SoftOrbits Background Remover will be introduced. And you can learn some basic information about each of them, as well as the steps to follow.
Picwand AI Photo Cutout
Picwand AI Photo Cutout is a professional background removal tool that provides AI solutions for photos on the web. However, it is not limited to this function. It has some additional image editing options like Resize, Flip, and Rotate, and it can also replace the background with many solid colors, templates, and customized images.
Furthermore, the process is really simple and fast. After uploading the photo, you just need to wait for a few seconds. The advanced AI technology used by this tool will completely erase the background and make a clear PNG you want. So, you no longer have to use the mouse to edit the image manually and slowly.
Last but not least, you must be curious to know whether Picwand AI Photo Cutout is just an online website or not. The answer is no! It can be used cross-platform, both on iPhone and Android devices. All the features mentioned in this tool are available for free!
Here are the steps on how to erase the background to create a PNG.
Step 1. Upload the image.
Click on the Upload an Image button, or drag and drop a PNG image to the box in Picwand AI Photo Cutout.

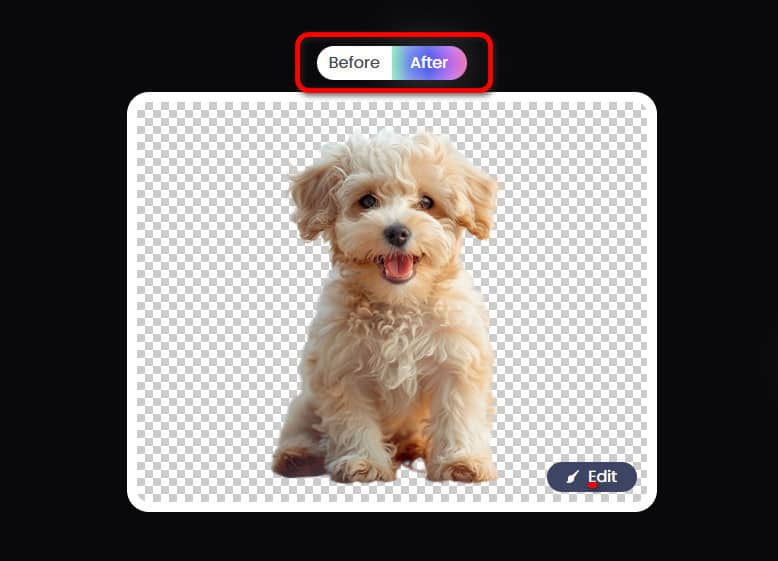
Step 2. Wait for the background to be deleted and preview it.
Just wait for a few seconds. Sometimes, the waiting time may be a little longer, but please be patient. Your photo is likely a little bit complex, and AI is refining it. Then, you can see the comparison of the effect before and after on the left side of the screen.
Step 3. Edit the background if you need.
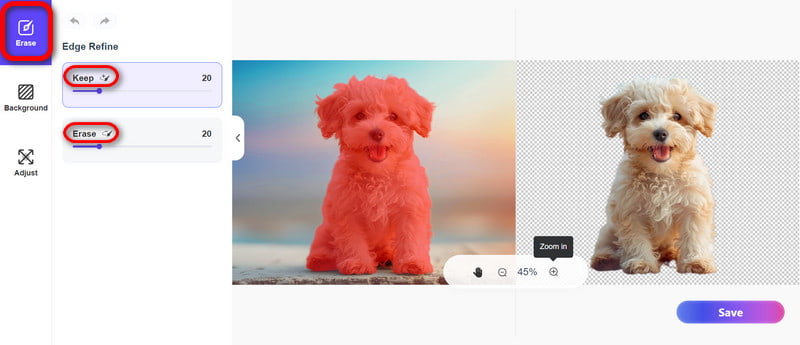
If you need to modify the image, such as changing a new background, cropping, flipping, and so on, click the Edit button in the lower right corner of the image to enter the editing interface. Or, if you need to erase the image background in a more detailed way, click the Erase button to resize it with the Keep tool and the Erase tool.
Step 4. Save the Image.
If you don’t have anything to resize, then you can click the Save button in the lower right corner to save the picture on your device.
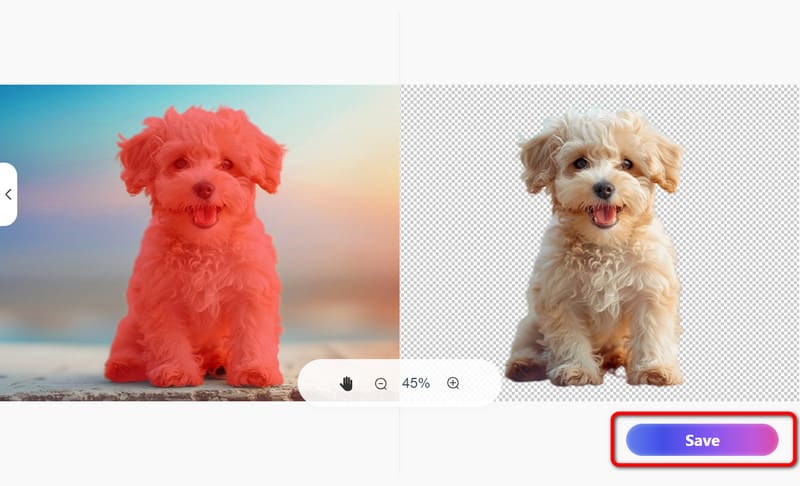
All in all, Picwand AI Photo Cutout is a good tool for erasing the PNG background. However, it certainly has some shortcomings, such as the fact that compared to other tools, it sometimes takes a little longer to erase the background after uploading. But not too long, about one minute or so. You can use this time to distract yourself and do something else!
Pixelcut
Pixelcut is an AI-powered photo editing application tool that supports both online use and iPhone and Android download. Its main features include automatic background removal and generating a new background using AI technology. It also has features like cropping images, adding shadows to images, and batch background removal. Regrettably, except for the basic background removal, you have to pay for a Pixelcut Pro License to use other functions.
Besides, its website requires you to carry out a Security Check to verify that you’re a human every time you visit it. If you complete the confirmation, you agree to their Terms of Service and Privacy Policy, and they will collect your personal information in this process.
Step 1. Uploading your PNG images by clicking the Upload Image button or dragging and dropping a PNG file into the box.
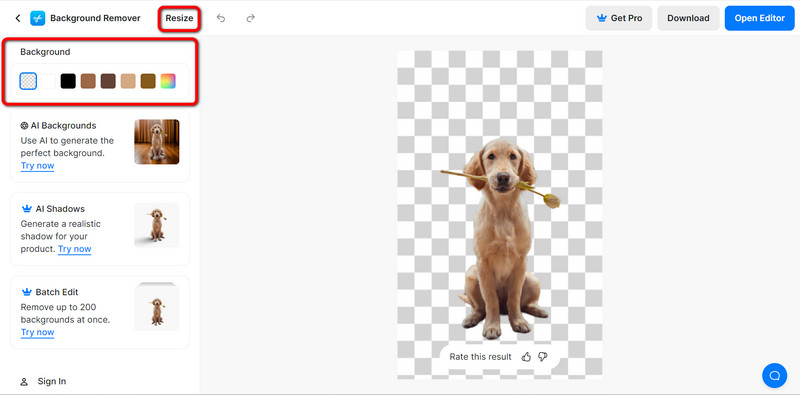
Step 2. Wait a few seconds after successfully uploading, and you can see the image without the PNG background. At the top of the left sidebar, you can choose the new background color and the size of the image if you need.
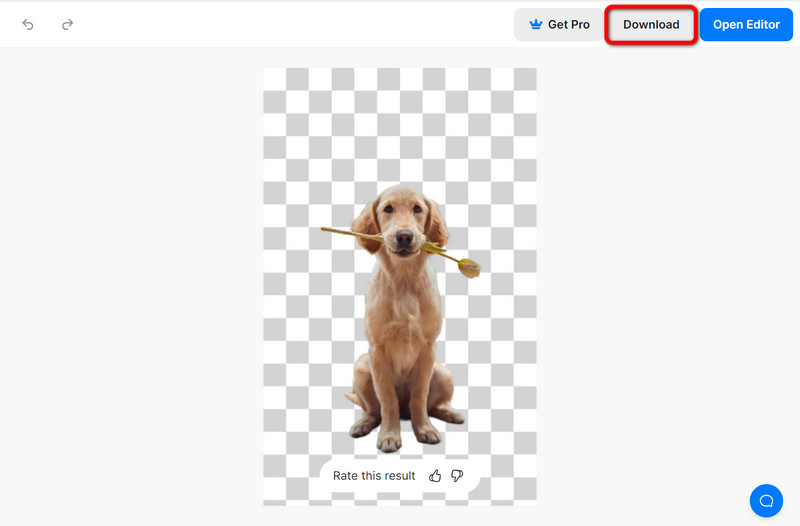
Step 3. Click on the Download button in the upper right corner and then choose to save in standard or high quality. But downloading in HD requires the Pro version.
Pixelcut is generally a good tool for making PNG backgrounds transparent. It is easy to use and quick to process, and it also supports cross-platform. However, the difference between the features available in the online version and the Pro version is too huge. Users need to be careful about the security of their personal information when using it.
Remover.bg
Remover.bg can delete backgrounds entirely and automatically in 5 seconds with just one click. This online PNG background remover completes the operation in such a short time, greatly reducing the user's waiting cost and improving the user experience. In addition, Remover.bg is available for Windows, Mac, and Linux.
Follow the instructions to make the PNG background transparent.
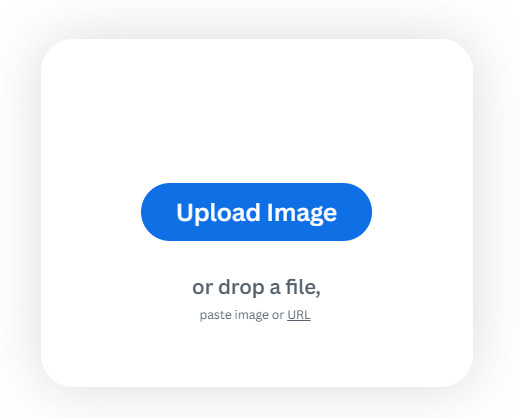
Step 1. Upload the PNG image by any of the three methods: drop the file, paste the image or URL.
Step 2. There is hardly any waiting, the PNG background is removed!
Then, you can check if you want to use other features, such as adding a new background with a photo or color, erasing or restoring manually if you feel something is not processed well, etc. You can also press and hold the button directly below the image to see after and before comparisons.
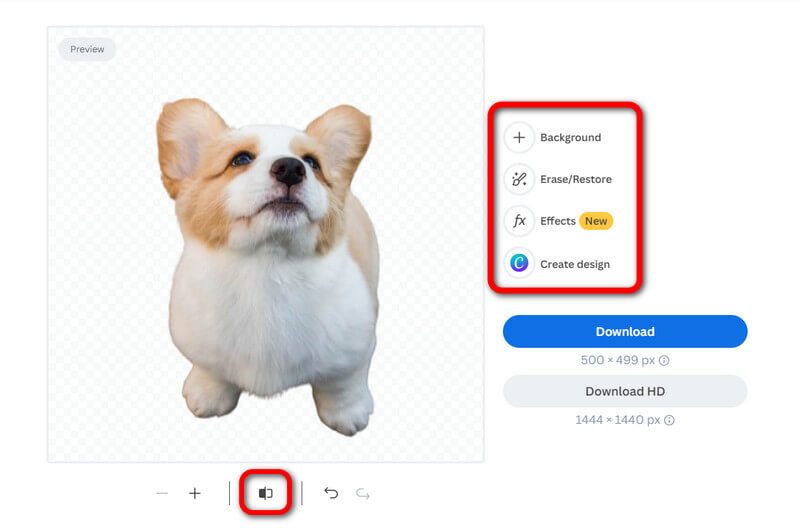
Step 3. Choose Download or Download HD to save the image. However, it’s worth noting that Download HD requires registration to use, and you can only download one file after registering for free.
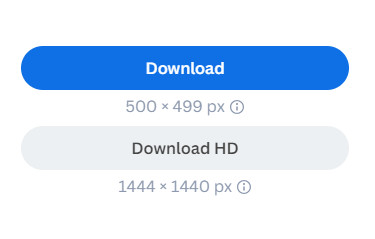
Objectively speaking, Remover.bg is actually a good tool for removing the PNG background. It processes fast and well. But in the free version, it can only download one HD image. And while it works well, it is a little pricey. Its Pay as You Go plan costs one credit per image, and one credit costs $1.99, which is a little not cost-effective for someone who only occasionally needs to erase a PNG background.
GIMP
GIMP is a cross-platform image editor software available for Windows, Linux, macOS, and more operating systems. It is commonly used by some professionals, such as graphic designers, photographers, or illustrators. Therefore, it is highly specialized. Overallly, it is probably more suitable for people who normally use professional photo tools like Photoshop rather than the average person.
There are many ways to get rid of the PNG background in GIMP, and here takes only one of them as an example. You can follow the steps below to delete it.
Step 1. Click the File button in the upper left corner, and then click Open in the dropdown list to import the PNG image.
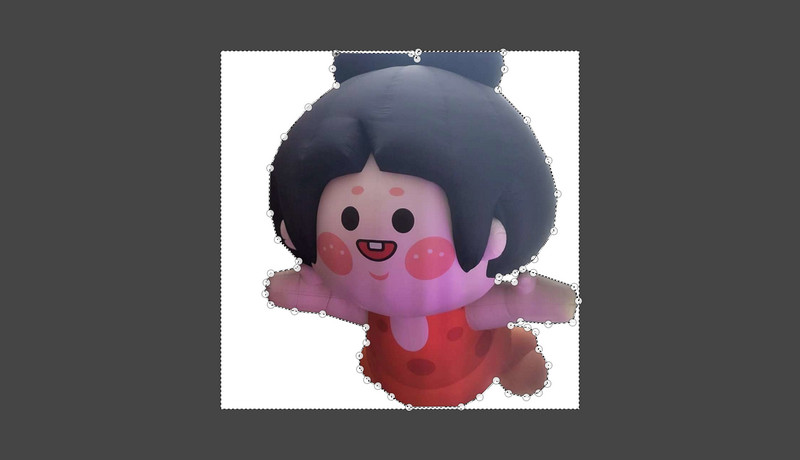
Step 2. Use the Paths tool to circle the part you want to retain by connecting a line from one point to another except from the background.
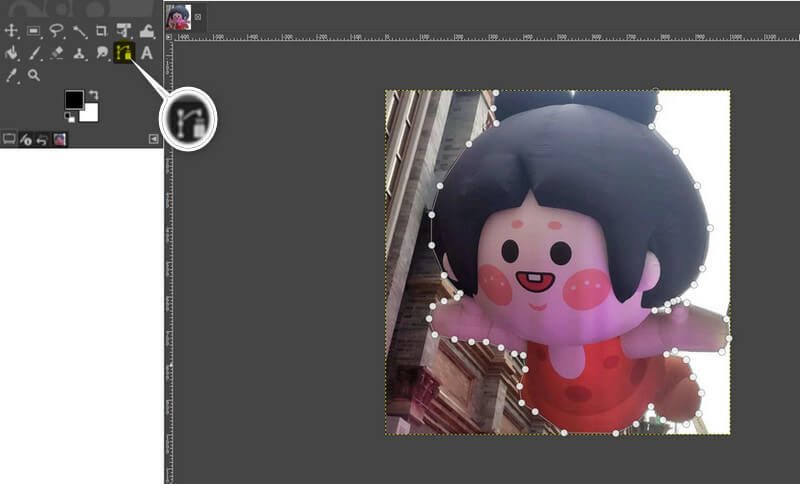
Step 3. Click Enter to confirm the area you circled. And then you can see an outline around the image like this.
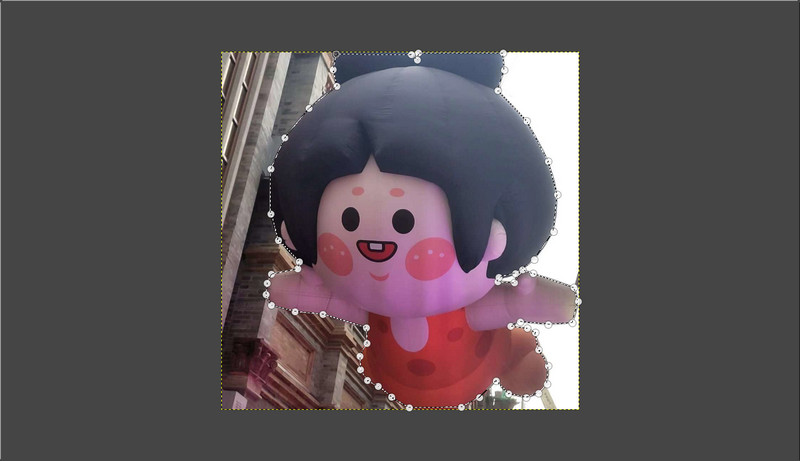
Step 4. Click Select and then Invert to select the background because what you want to delete is the background. You can also press Control and I at the same time.
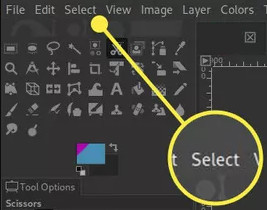
Step 5. Press Delete to see the effect of the image without the PNG background. If you are satisfied with the photo, you can save it by clicking File-Export As…, or you can also press Shift, Control, and E on the keyboard.
To sum up, GIMP is a very professional image editing software with abundant functions like background removal, image enlargement, and more. But it’s so specialized and complicated that an ordinary user who just wants to remove the PNG background has to spend time learning how to do it. It is more suitable for those professionals for professional purposes.
SoftOrbits Background Remover
SoftOrbits Background Remover is also a background remover that is also available for Windows, Mac, and Linux. It has two ways to remove the background: automatically and manually. The automatic one is more convenient and doesn’t require any manual operation. The manual one is a bit troublesome, but its advantage is marking the removal area more precisely. In addition to this, it can also process a group of photos in Batch Mode. Unfortunately, the users aren’t allowed to use this function in the free trial version, nor can they download the images.
There are two ways to remove the PNG background in SoftOrbits Background Remover: automatically and manually.
Remove PNG background automatically in SoftOrbits Background Remover:
First, let’s start with the first method of automatic removal. The operation of Automatic Remover Software is very easy. You just need to add the image file you want to remove the background and then click the Remove button.
Then, wait no more than five seconds, and the PNG background is removed from the images automatically.
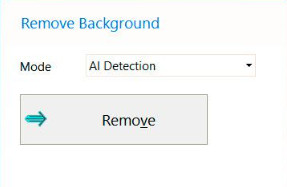
However, although the automatic removal feature is very convenient. Sometimes, it does not work because of an alert: Downloading presets for unknown reasons.
Remove PNG background manually in SoftOrbits Background Remover:
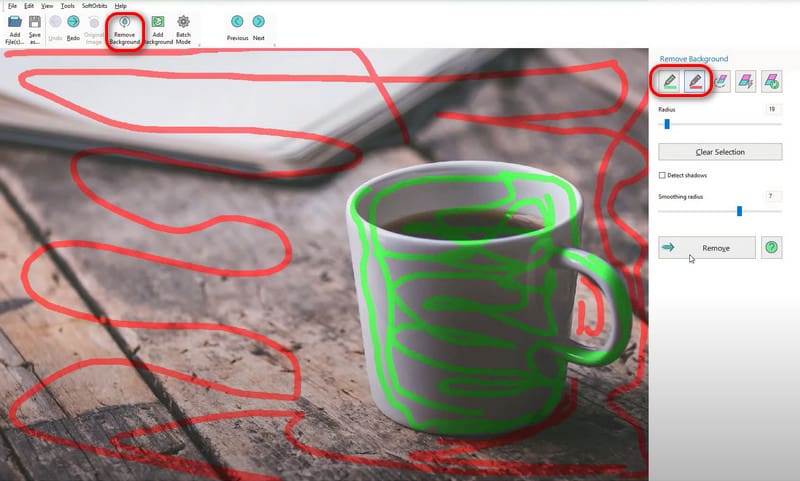
The second manual method is more tricky. It requires you to draw the areas where it is removed and kept with your mouse, little by little.
Step 1. Upload the PNG image by dragging and dropping the image file into the box.
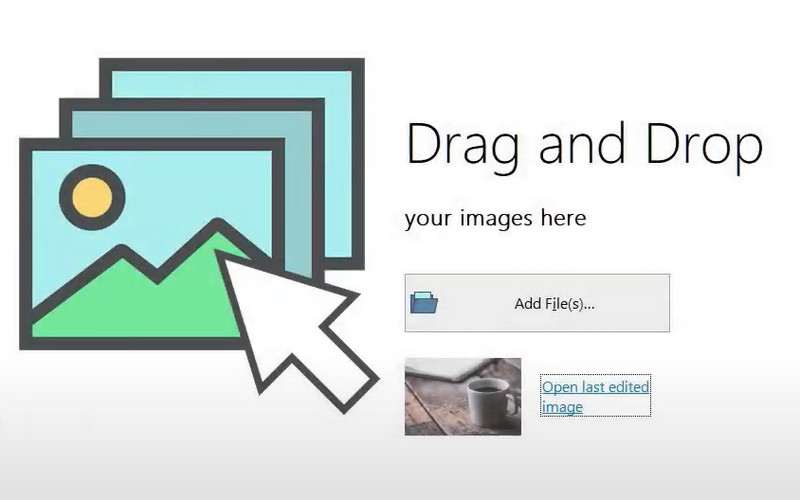
Step 2. Click the Remove Background button, and select the background with the red marker and the foreground with the green marker in the removal pane. Then, click the Remove button.
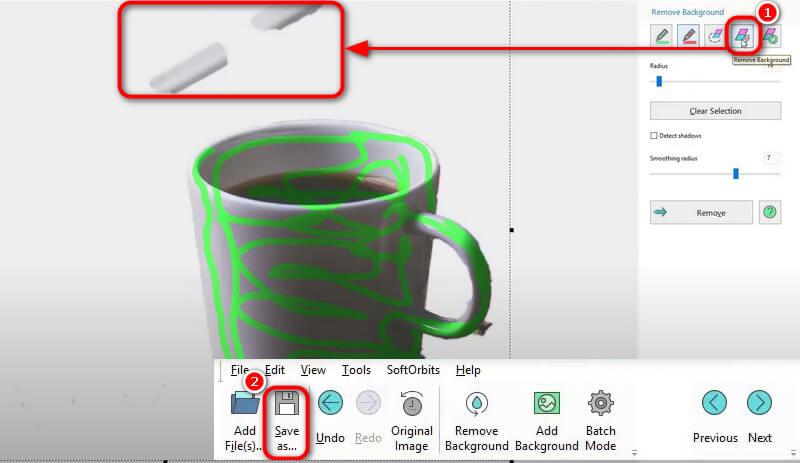
Step 3. Manually remove some imperfections using the Remove Background tool. Eventually, click Clear Selection to remove the green marker and save it.
Finally, SoftOrbits Background Remover's automatic background removal is very convenient, but sometimes there will be a bug, and it can’t be used normally. Manual removal is troublesome and cannot be finished accurately. It often requires you to use the tool to remove the PNG background little by little.
Part 3. FAQs
How to remove a fake PNG background in Photoshop?
You can try these steps to make a clear PNG background in Photoshop:
1. Select your photo in the Layers panel and unlock the layer.
2. Click Remove Background under Quick Actions.
3. Use the Brush tool to clean up small parts of the background.
4. Drag a new image to replace the backdrop.
5. Drag the new image beneath the original one, and then save it as a PNG file.
Can I modify a PNG image?
Yes, you can modify a PNG image freely. Many tools can help you do this, such as Picwand AI Photo Cutout, Pixelcut, and GIMP, as mentioned in the article.
Do all PNG files have a transparent backgroun
No, not all PNG files have a transparent background, but this format supports images with transparent background.
Summary
In summary, there are a great number of tools to get rid of PNG background, and many of them can help you to do it quickly and nicely, such as Picwand AI Photo Cutout, Remover.bg, and the more professional software, GIMP. Among them, Picwand works well and supports cross-platform and a lot of file formats. Remover.bg processes fast and well, although the free version only allows you to download one best quality image, it’s also a good choice. We believe that you have been very skilled at how to get it after reading this article!
AI Picwand - Anyone Can be A Magician
Get Started for Free

