Reduce Image Noise & Restore Quality: Denoise Image in Photoshop
Digital noise greatly affects the quality of your images, making them grainier or distorted in low-light situations. If you want your photos to look sharp and professional, understanding how to reduce noise correctly is essential. This guide will discuss various types of digital noise and show how to denoise image in Photoshop using some built-in tools. We’ll discuss how to remove color and luminance noise, restoring the clarity of your image. We will also show you Picwand AI Photo Restoration as a powerful noise-reduction alternative. From manual picture improvement to AI-powered solutions, this article will show you how to swiftly and simply improve your photos.
Contents:
Part 1. Types of Digital Noise
Noise refers to digital noise, an artifact that occurs while taking a picture in low light conditions, mainly when you use higher ISO levels. However, it might lower your overall quality. Before learning to denoise Photoshop, let's look at the two types of digital noise to consider:
1. Luminance Noise
Luminance noise appears as grainy artifacts or movie-like grain on an image. It primarily impacts brightness levels and hues. It is hundreds of times less subtle than color noise, but it gives an image a blurry appearance.
2. Color Noise (Chromatic Noise)
Color noise is an image's random red, green, and blue dots. It is located in the shadow stain or pure color background and gives less interference to luminance noise.Understanding the types of noise in an image will help you determine which Photoshop tools and techniques to use to reduce them. In the upcoming sections, we can learn how to denoise Photoshop by individually addressing color and luminance noise.
Part 2. How to Reduce Noise With Color Noise in Photoshop
If you’ve ever captured an image in low light and examined it to find colorful red, green, or blue spots sprinkled throughout, that’s color noise, sometimes referred to in a more technical sense as chromatic noise. It will make your photographs look cluttered and sloppy. Fortunately, Photoshop has tools to help address this. Here’s how to remove grain in Photoshop in Color Noise.
Step 1. Open Photoshop and load the image with the noise you want to edit.
Step 2. Press Ctrl + J (Windows) / Command + J (Mac) before changing the image to copy the layer and preserve the original image.
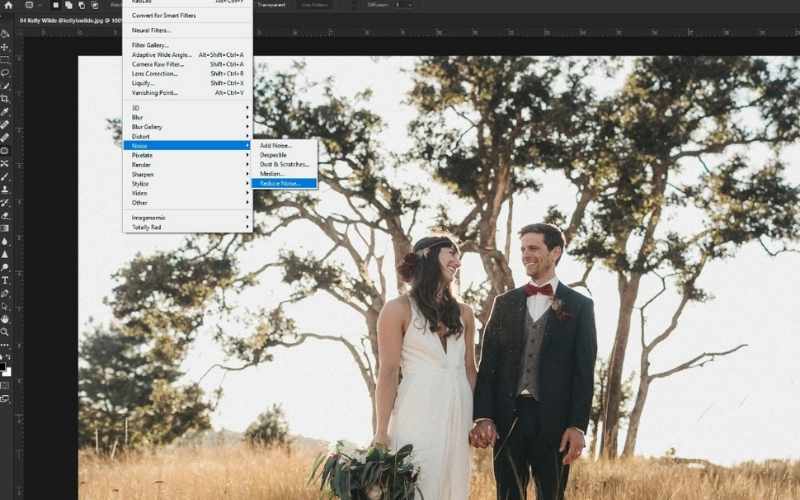
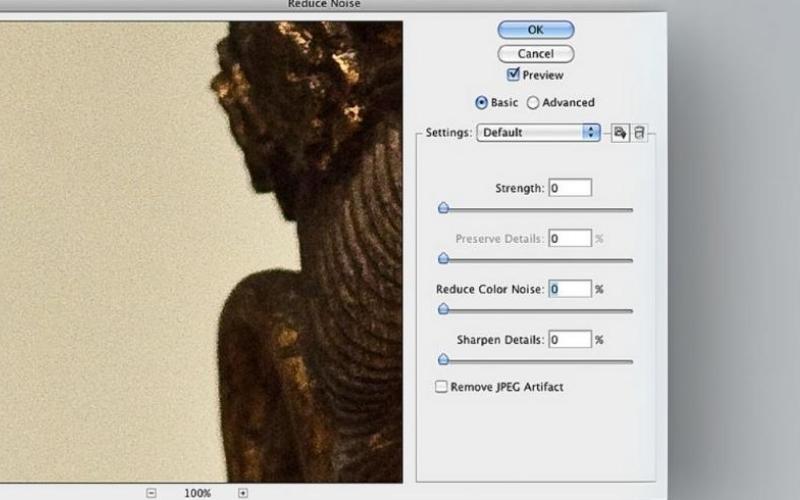
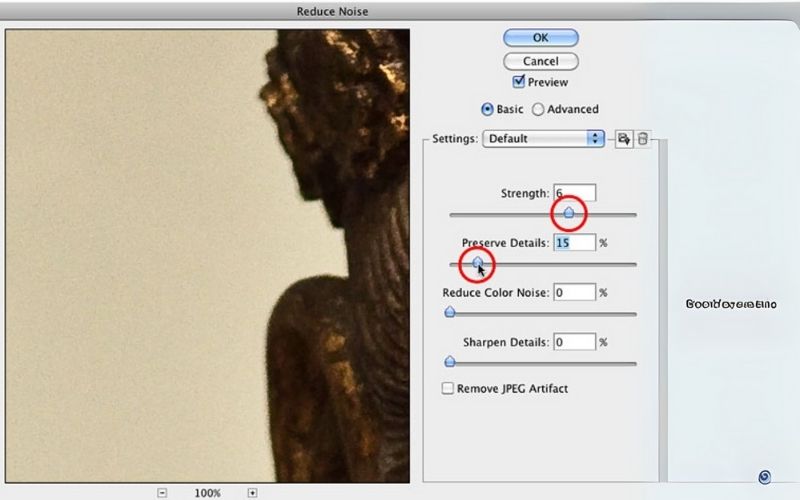
Step 3. Head to the Filter menu, click Noise, then click Reduce Noise to open Photoshop’s noise reduction panel.
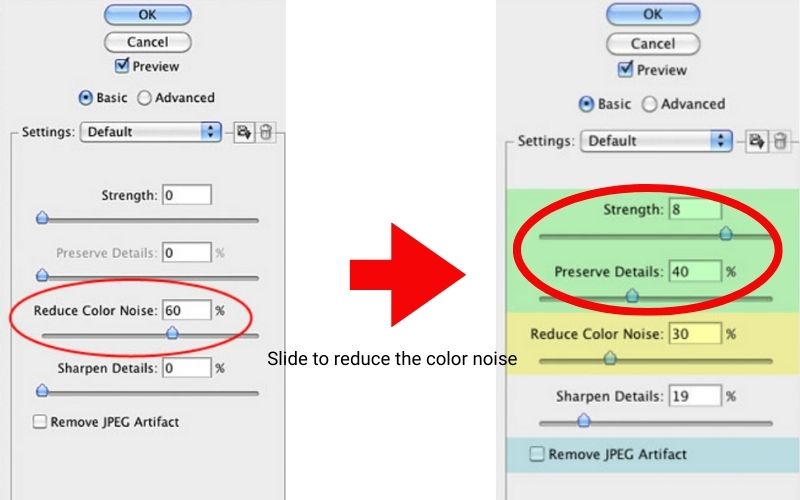
Step 4. While in the Reduce Noise, find the slider, and you can adjust it until the unwanted color dots disappear.
Step 5. Adjust the Strength slider to smoothen the noise while keeping important details sharp. Preserve texture with the Preserve Details slider.
Step 6. To save your noise-free image and apply the settings, click OK once you're satisfied. By following these methods, you may enhance the quality and cleanliness of your images!
Part 3. How to Reduce Noise With Luminance in Photoshop
When your photograph looks grainy or rough, especially in dark areas, it’s usually due to luminance noise. It contrasts with color noise, which can be seen as tiny colored specks, while luminance noise is an overall grainy noise pattern that affects your image's brightness. It can sometimes lead to a fully composed and elegant style, saving your photos from looking too glossy, although Photoshop can also achieve this. Here is how to use Photoshop to remove grain in Luminance Noise.
Step 1. Add the photo that you think is grainy. To access noise reduction settings, go to Filter, navigate to Tool Noise, and select Reduce Noise.
Step 2. Use the Strength slider in the Reduce Noise window to retain important details while removing graininess.
Step 3. Adjust the Preserve Details slider for crisp textures and reduced noise. If the image seems too soft after grain removal, adjust Sharpen Details.
Step 4. Click OK to save the altered image once you're happy with the outcome.
These easy steps in Photoshop allow you to reduce grain and clear your pictures better while avoiding too much detail loss.
Part 4. Best Alternative: Picwand AI Photo Restoration
If you are looking for an easier tool to fix grainy pictures without fiddling with settings in Photoshop, Picwand AI Photo Restoration is just right for you! It analyzes the image data and uses machine learning to denoise and restore the image while enhancing the overall quality. Unlike Photoshop, which requires fine-tuning, Picwand does most of the work for you in a few clicks.
The Benefits of Picwand AI Photo Restoration
• Get rid of manual adjustments. Picwand handles everything.
• Restores image clarity while maintaining the essential details.
• Great for those without Photoshop or advanced editing experience.
• You don’t need to install it. Simply access it through your browser.
Guidelines to Get Started with Picwand AI Photo Restoration
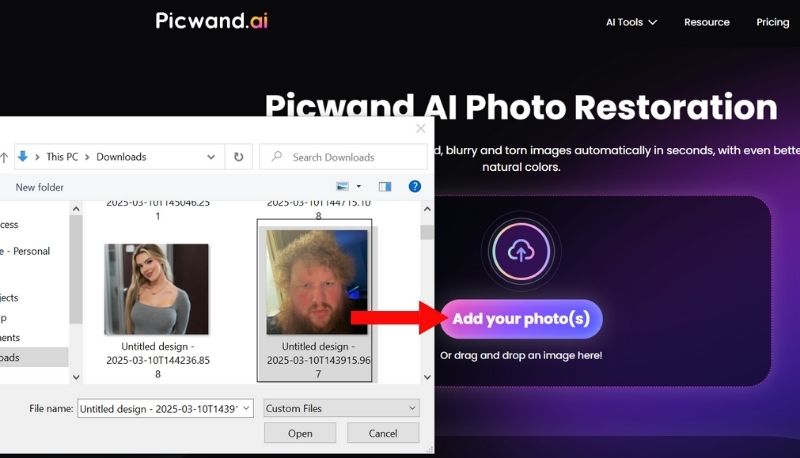
Step 1. Launch your web browser by clicking the above link to Picwand’s official website.
Step 2. Click the Add Your Photo and choose the noisy picture you want to repair.
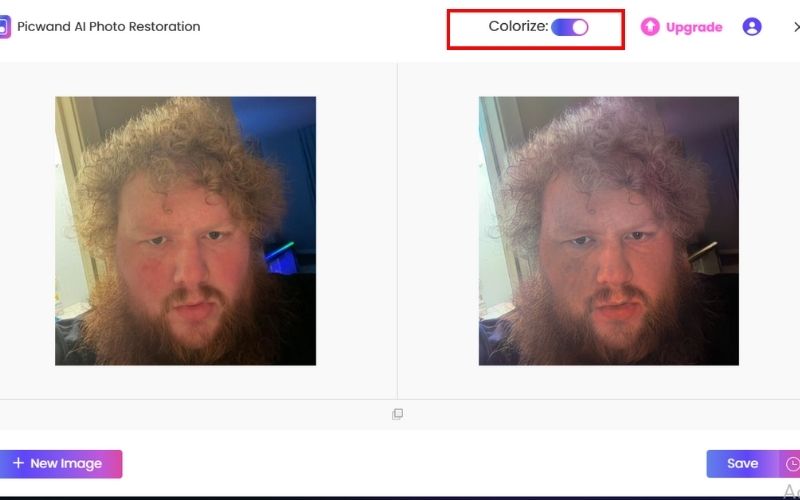
Step 3. Picwant`s AI will analyze and remove noise automatically. To change the filter color, you can also toggle the Colorize option to add appeal to the image.
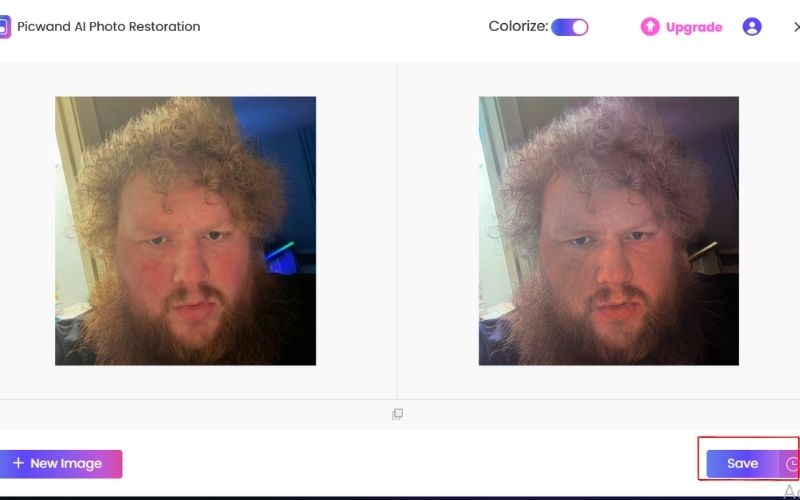
Step 4. You can download the image you changed if pleased with the result.
Thanks to Picwand AI Photo Restoration, you can simplify the process by automatically cleaning your photos without manual editing. It replaces capital for those who want a great score with minimal effort.
Part 5. FAQs about Denoise Image in Photoshop
How can I remove grain in Photoshop more efficiently?
To get the best results: Work with high-resolution images for better quality. Use layer masks to apply noise reduction only where needed. Combine noise reduction with sharpening to maintain crisp details.
Is there an alternative to Photoshop for noise reduction?
Yes! Picwand AI Photo Restoration is a great option for a simpler solution. It automatically removes noise and makes an image higher resolution without manual adjustments.
Does noise reduction in Photoshop affect image sharpness?
Excessive noise reduction can make an image look too soft or blurry. Adjust the Preserve Details and Sharpen Details sliders while using the Reduce Noise filter to prevent this.
Can I denoise an image in Photoshop using Camera Raw?
Yes! The Camera Raw Filter has a Noise Reduction panel where you can adjust the Luminance and Color Noise sliders to better control noise removal.
How can I avoid noise in photos before editing in Photoshop?
To reduce noise before post-processing, shoot at the lowest ISO setting appropriate for your lighting. Use proper lighting to avoid underexposure. Grab shots in RAW format for more editing flexibility.
Conclusion
Fixing the noisy photos is required to get high-quality, expert-looking pictures. By lowering luminance and color noise, the Denoise Photoshop capabilities help maintain important details in photos and improve overall clearness. Native tools in Photoshop, such as the Reduce Noise filter and Camera Raw adjustments, offer solid solutions for reducing noise. In contrast, if you need a simple and effective alternative, Picwand AI Photo Restoration provides an AI-based approach to restore the quality of an image with little effort. So, no matter if you use Photoshop or AI tools, noise reduction is an essential thing to master, thus making your photos look sharp, clear, and attractive.
AI Picwand - Anyone Can be A Magician
Get Started for Free