Convert Image to Pixel Art with GIMP
Photo pixelation is a technique that transforms images into low-resolution compositions of large, visible pixels. The pixel images have gained popularity among netizens for their distinction from numerous high-definition photos. It is commonly used for artistic creation, game design, privacy protection, and retro styling. Now this article will guide you on how to convert images to pixel art with GIMP.
Contents:
Part 1. How to Make Pixel Art with Gimp
GIMP is a well-known image editor. And making pixel art is one of its functions. The app allows users to create pixel photos with various methods and parameters. And it is accessible on Windows, macOS and Linux platforms. Besides, it also works on upscale, downscale and other photo editing functions. There are steps for you to create pixel image with GIMP.
Approach 1. Scaling
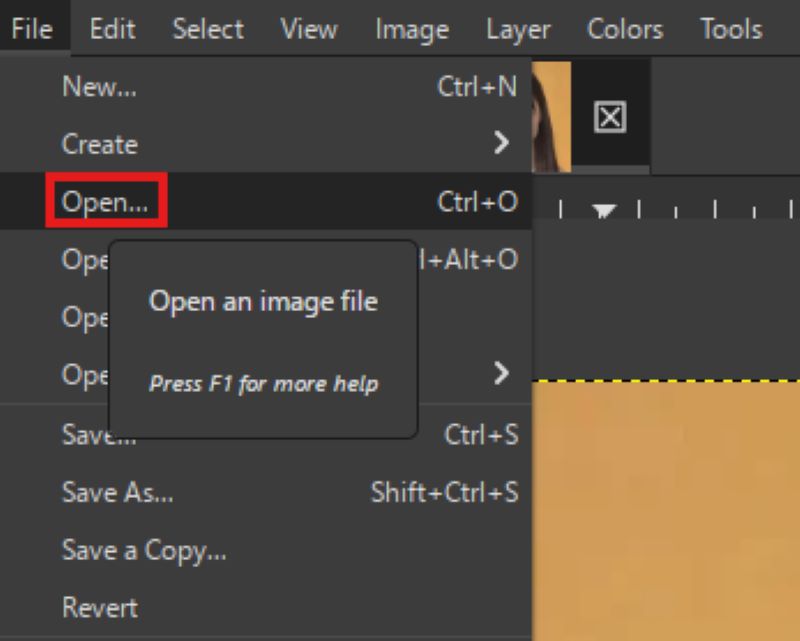
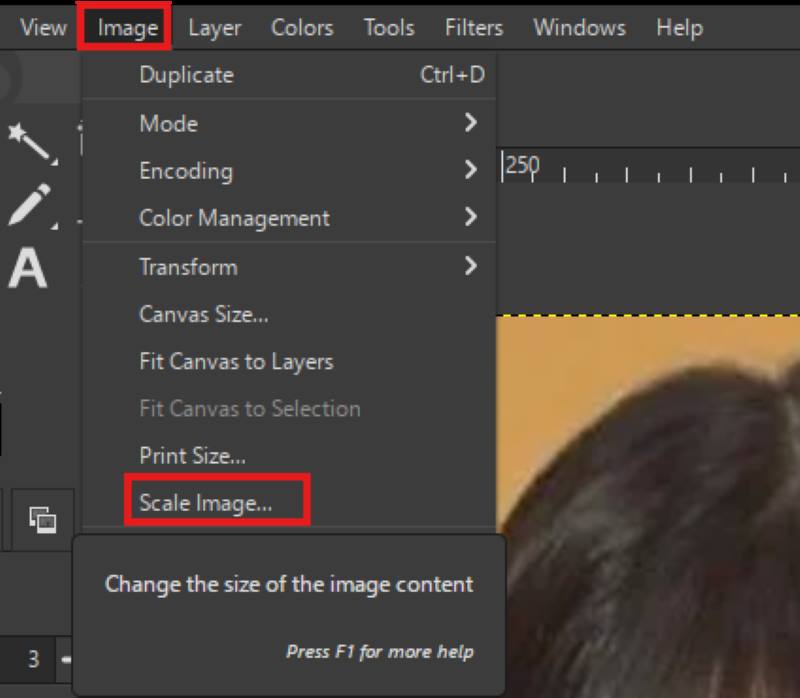
Step 1: Open your image in File.
Step 2: Downscale the photo.
Find Image and click Scale Image.
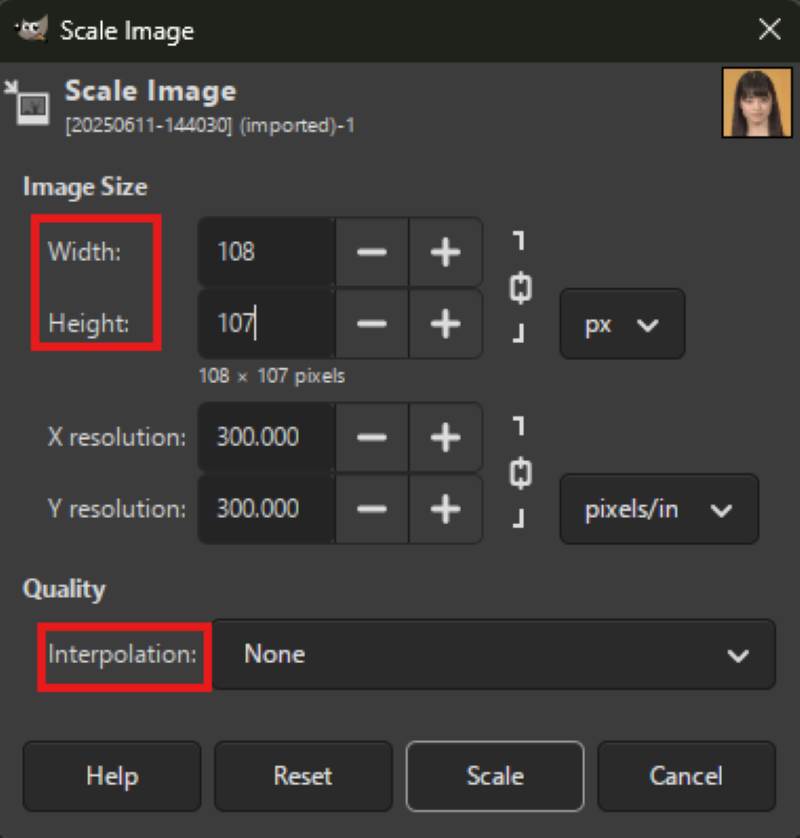
Here are some key parameters to downscale the image.
Width and height - They are suggested to reduce to 5% - 20% of the original. For example, if your picture is 4000*3000 pixels, you should change it to 200*150 pixels.
Interpolation - You must select Nearest Neighbor/none. Otherwise, you will get a blurred picture instead of pixel art. Finally, click Scale to confirm the effect.
Suggestions for adjusting.
For adjusting background texture or blurring the face to get light pixelation, the suggested downscale ratio is 30% - 50%
For retro game assets, you’d better keep the ratio at 10% - 20%.
For heavy abstraction, you can set a ratio of 1% to 5%. It is usually applied in minimalist icons.
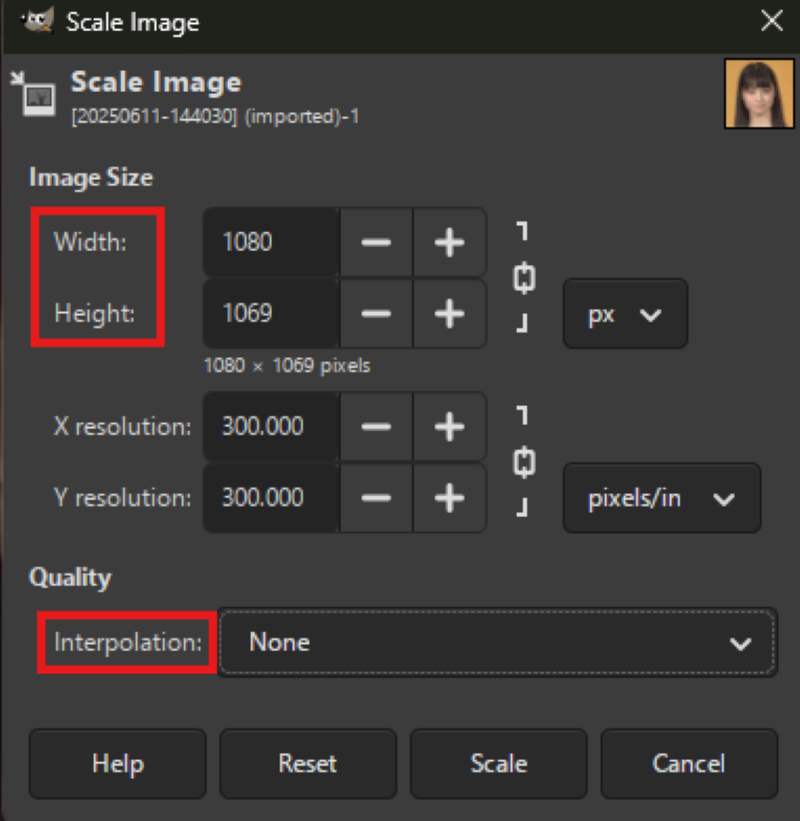
Step 3: Upscale to the original dimensions.
Reopen Scale Image and turn the Width and Height into original values, maintaining Nearest Neighbor or None in the Interpolation. Then, you can click Scale to output your pixel art.
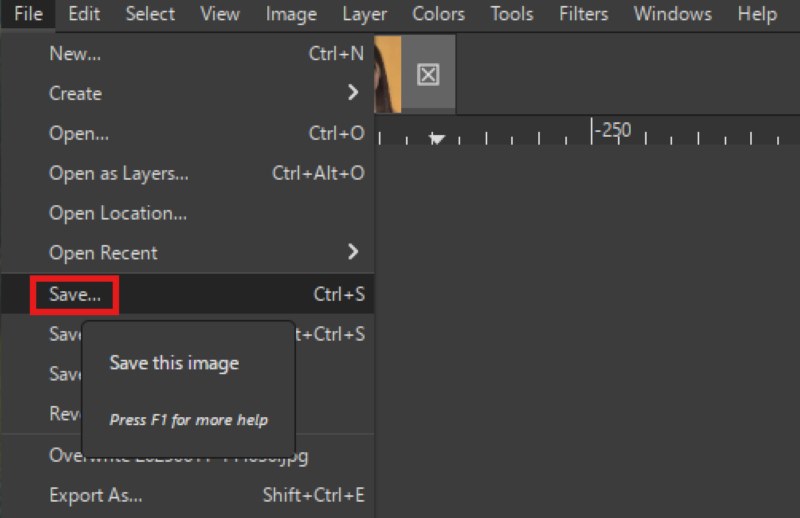
Step 4: Export your art.
After finishing the adjustments, you can enter File and export the image.
Feature: It is a basic pixelation method with simple effects.
Approach 2. The Mosaic Filter
You may find it hard to remember these numbers. And there is a more straightforward method of converting photos to pixel art, that is, applying the art filter, the Mosaic Filter.
Step 1: Import your image.
Click Ctrl and O to open the picture instantly.
Step 2: Find the Mosaic filter.
Find Distorts and choose Mosaic from the list of filters.

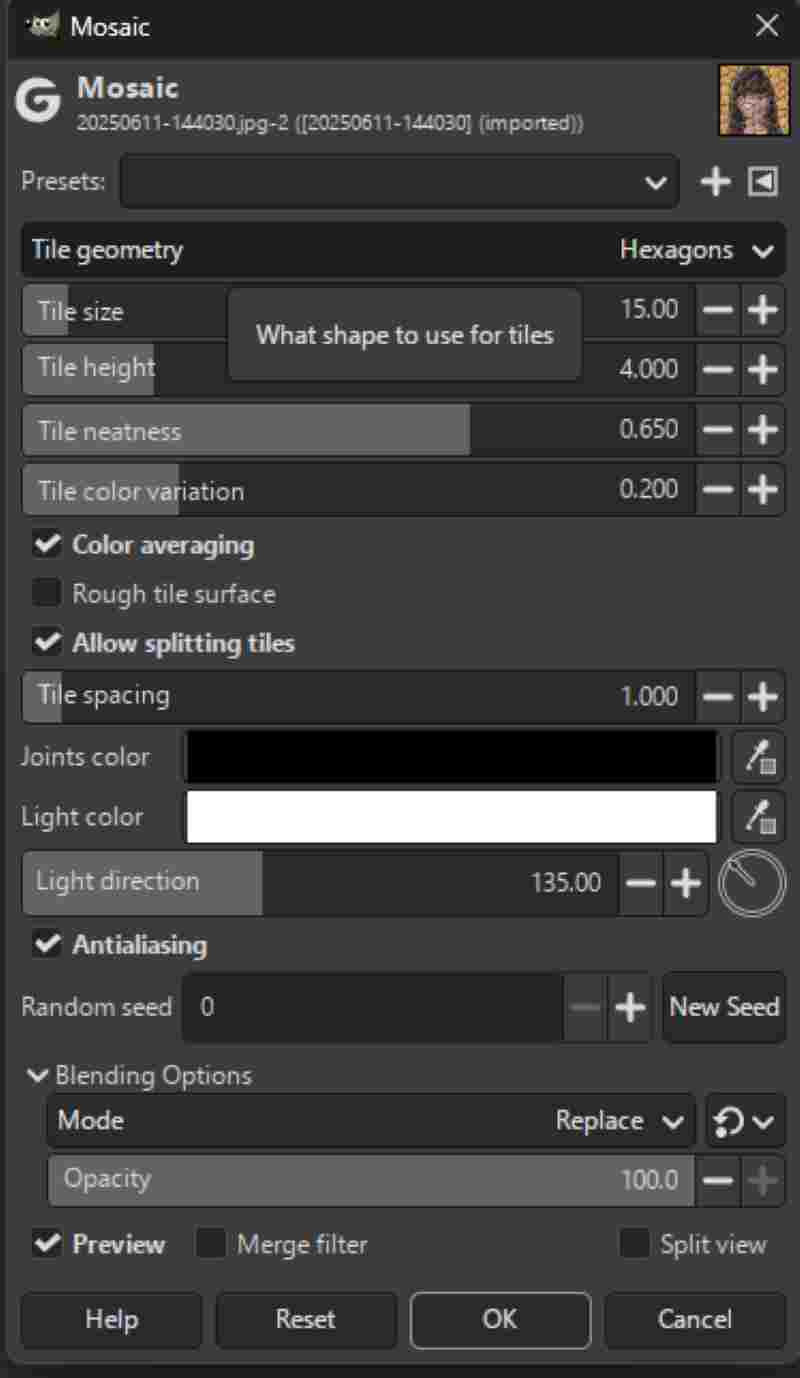
Step 3: Make adjustments.
You can change the tiles’ size, shape, and color here.
The adjusted effect will be presented in the picture. Click OK after you get a satisfying image.
Step 4: Export your art.
After making adjustments, click Ctrl and S to save your art.
Feature: It realized an easy and accurate control of tiles, but the effect is quite stiff.
Approach 3. Indexed Color (8-bit Style)
To blend those colors naturally, you can decrease the number of color blocks.
Step 1: Import your image.
Click Ctrl and O to upload your photo.
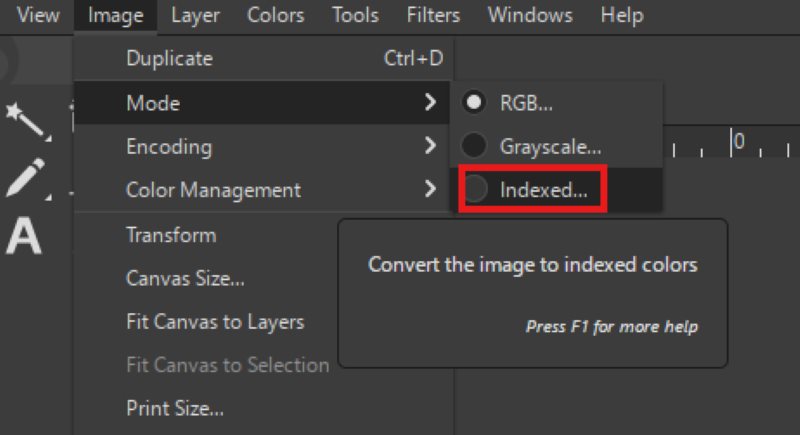
Step 2: Path.
Find Image and Model, then choose Indexed color conversion.
Step 3: Make adjustments.
Here are some basic parameters.
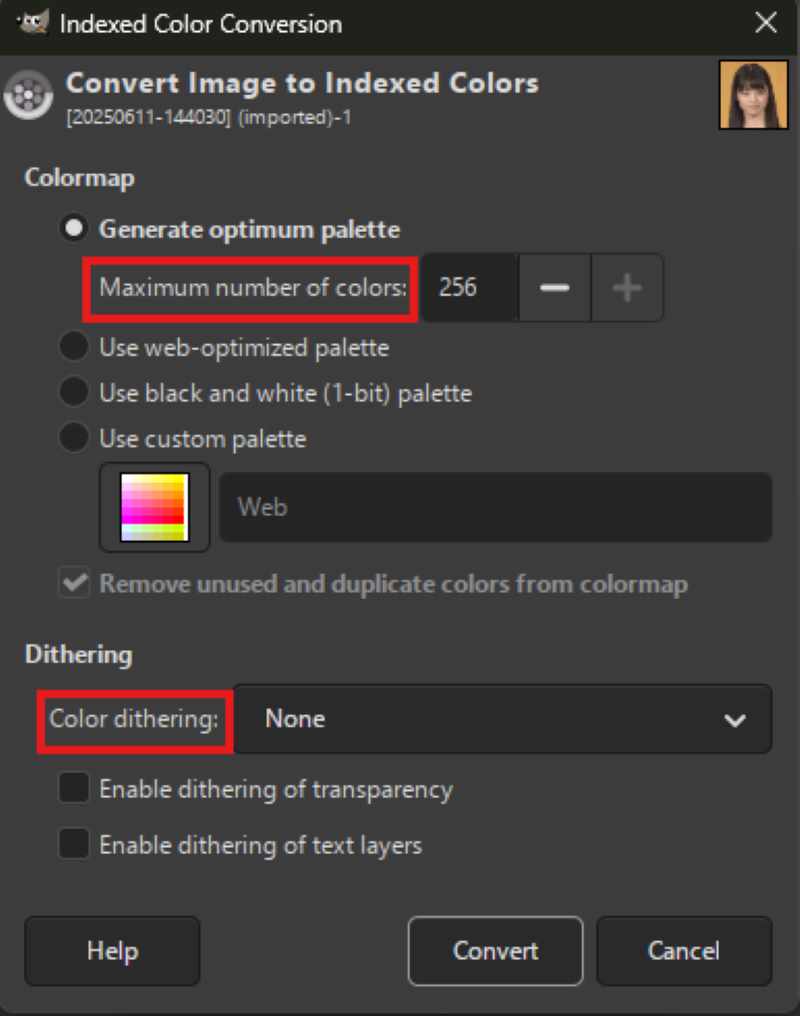
Maximum Colors - Set to 8 to 32 colors. Fewer colors will create a more retro effect.
Color Dithering - Choose None to maintain solid color blocks.
Check the final effect - click Convert to transform the image into pixel-style limited colors.
Step 4: Export your art.
Click Save in File to get your pixel photo.
Feature: It supports forced color reduction and is perfect for retro gaming style. However, it usually causes a blurred picture.
Part 2. How to Make Pixel Art with Picwand
Different from GIMP, the whole conversion in Picwand is finished by AI. You do not have to remember any terms or values. The pixel art will be generated after you select the Style. It suits various scenarios, including creative design, social media content, advertising, and game development. And here are the steps for you to make pixel art with Picwand.
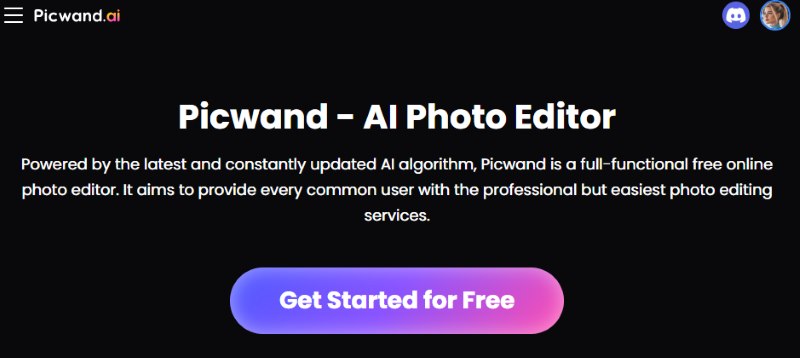
Step 1. Find Picwand and Import your image
Enter the Picwand website. Then, you can open an image.
Step 2. Apply Pixel Art
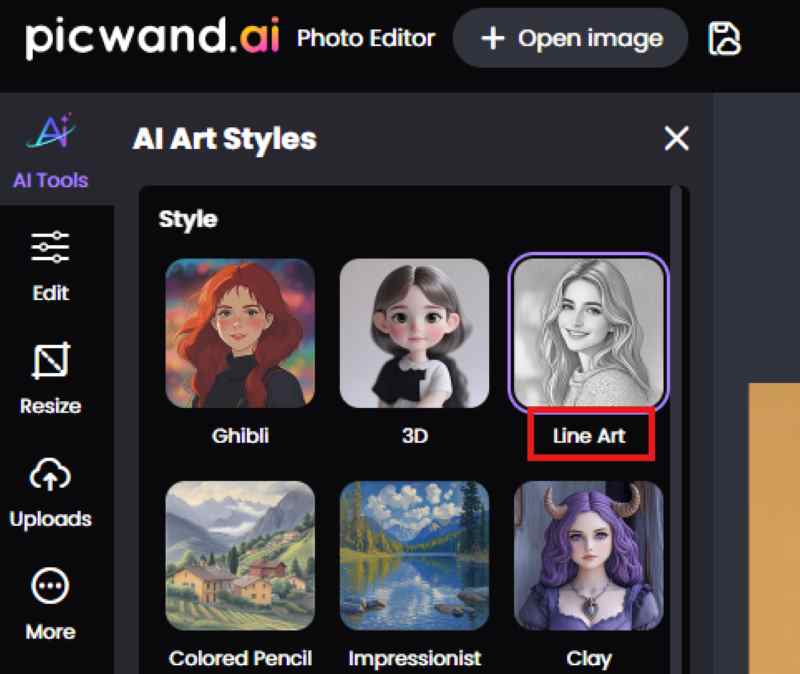
Click AI Art Style in AI Tool section. Then, you can find Pixel Art in them. The pixel image will be instantly generated after clicking the button. The effect has been optimized so users get a nice picture without adjustment.
Step 3. Make adjustments
There are settings for adjustments, and you can refine some details.
Step 4. Export your pixel art
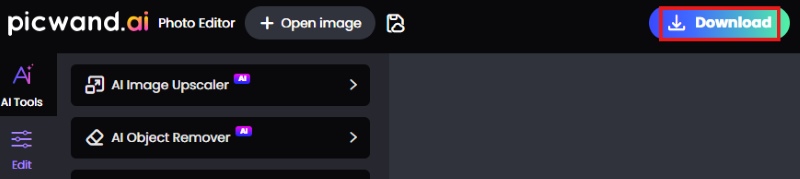
Remember to Apply your adjustments before exporting the image. Then you can Download your pixel art. Here, you can check the image resolution and choose the format and quality.
Feature:
AI processing and manual adjustments are fairly combined, which shows excellent efficiency and controllability.
Part 3. FAQs
Is there any art knowledge or skills needed for the pixelation?
No, both GIMP and Picwand are friendly to non-professionals. Users without artistic foundations can process the image by reading the tips and checking the effects.
Which one is the most friendly to beginners?
Compared to GIMP, the operation of Picwand is much easier. You do not have to remember any values to make the pixel art. And its interface is easy to understand. With a few clicks, the pixel image will be easily shown.
Conclusion
To sum up, GIMP supports several methods for users to create different pixel images. The services are free, but you must do the step-by-step transformation. In comparison, you can finish the pixelation in Picwand with a few clicks. And it always results in a perfect pixel image. So, it is best to choose Picwand for its convenience and aesthetics.
AI Picwand - Anyone Can be A Magician
Get Started for Free