Increase Photo Resolution in Photoshop: Best Guide & Pro Tips
High-resolution images contain more pixels, offering finer details and sharper clarity, which are crucial for tasks like large prints, web displays, and detailed editing. While low-resolution images may look acceptable on small screens, they often appear pixelated and blurry when enlarged, especially for prints. They also lack sufficient detail for cropping, zooming, or enhancement.
To address these issues, maintaining high resolution is essential for better visual quality. Fortunately, Photoshop provides powerful tools to enhance image resolution while preserving clarity. In this article, we'll share 3 practical methods to increase picture resolution in Photoshop, as well as a powerful alternative for easier operations!
Contents:
- Method 1. Use Preserve Details 2.0 in Photoshop
- Method 2. Use Bicubic Smoother in Photoshop
- Method 3. Use Neural Filters in Photoshop
- Tips: Achieve the Best Results Picture Resolution Increasing
- FAQs About Increasing Picture Resolution in Photoshop
- Bonus: An Alternative for Increasing Picture Resolution
Method 1. Use Preserve Details 2.0 in Photoshop
Photoshop increases the resolution of images by resizing them or adjusting the PPI (pixels per inch). For the best results, you can apply both changes simultaneously. Before we start, please make sure that you have downloaded Photoshop on your device.
The Preserve Details 2.0 tool is particularly effective for upscaling images while retaining detail, making it ideal for boosting resolution with minimal quality loss. It is excellent for sharpening photos for printing or digital art but works best with decent-quality images. For extremely low-resolution pictures or blurry text issues, consider using AI tools for better results.
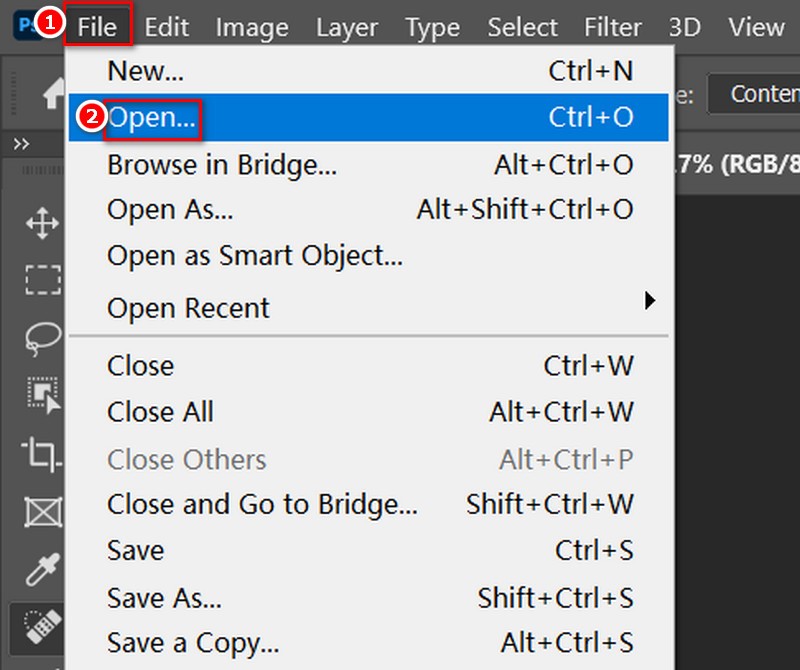
Step 1. Open Photoshop and upload the photo that you want to upscale.
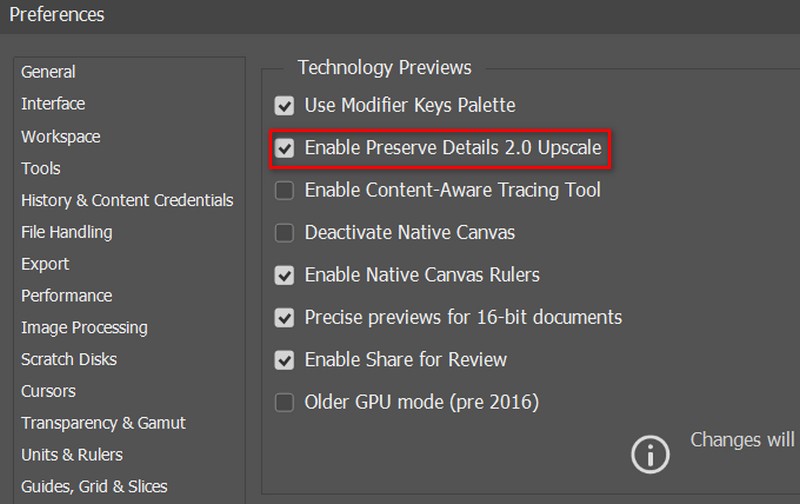
Step 2. Head to Edit > Preferences > Technology Previews. Then, check the box for Enable Preserve Details 2.0 Upscale. Then, you're all set for upscaling.
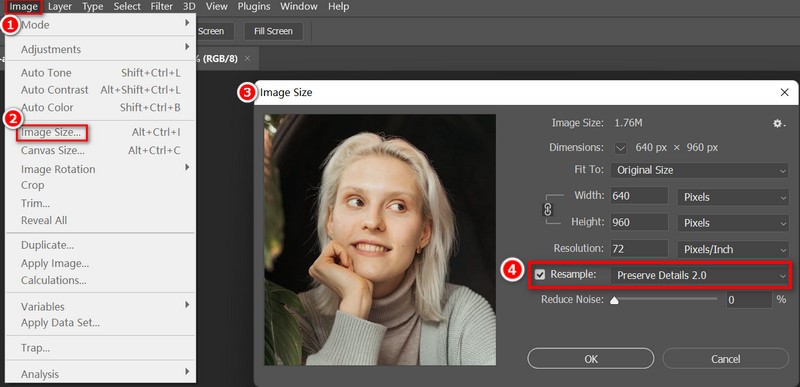
Step 3. Go to Image > Image Size. This opens a dialog box that shows your current image size. Check the Resample option. From the dropdown, select Preserve Details 2.0. This is the magic part!
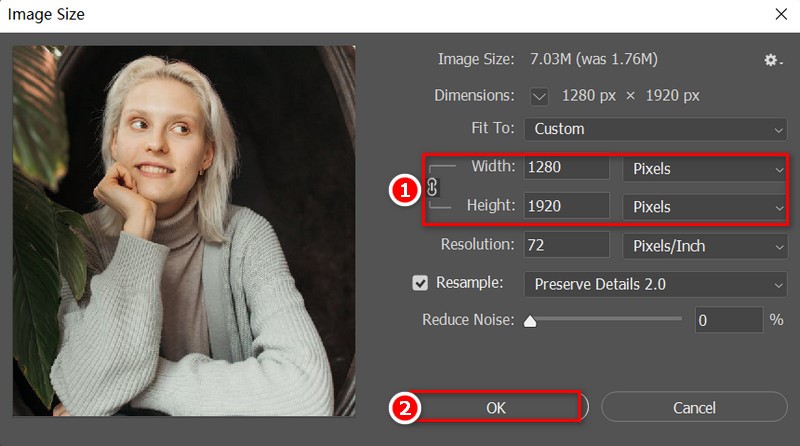
Step 4. Now, enter the new Width and Height you want. If you're doubling the size, just bump those numbers up by 200%. You can watch the preview to see how it looks. Once you're satisfied with the result, you can hit OK to make the changes stick!
Method 2. Use Bicubic Smoother in Photoshop
Bicubic Smoother is also an effective option to enhance image resolution, especially for producing smoother results in images with soft transitions, such as portraits or landscapes. This resampling method minimizes jagged edges and artifacts, making it ideal for increasing picture resolution.
However, please note that excessive scaling can still result in noticeable detail loss, as Bicubic Smoother primarily focuses on maintaining smoothness rather than sharpness. To achieve the best results, consider combining this method with other Photoshop tools like sharpening filters or Preserve Details 2.0 to enhance clarity after resizing.
Here's how to use this feature to enlarge images step by step:
Step 1. Upload the image you want to resize.
Step 2. Click on Image in the top menu, then select Image Size. This will open a dialog box showing your current image dimensions.
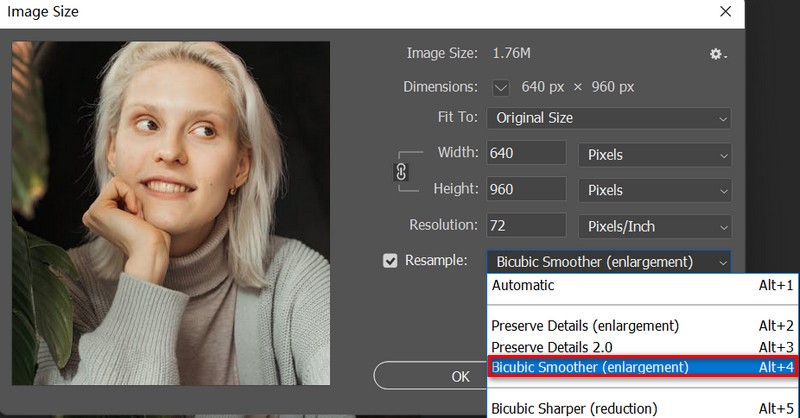
Step 3. Same as Preserve Details 2.0, Bicubic Smoother is also triggered by clicking Resample. Choose Bicubic Smoother(enlargement). This option is specifically designed for enlarging images and helps keep the quality smooth.
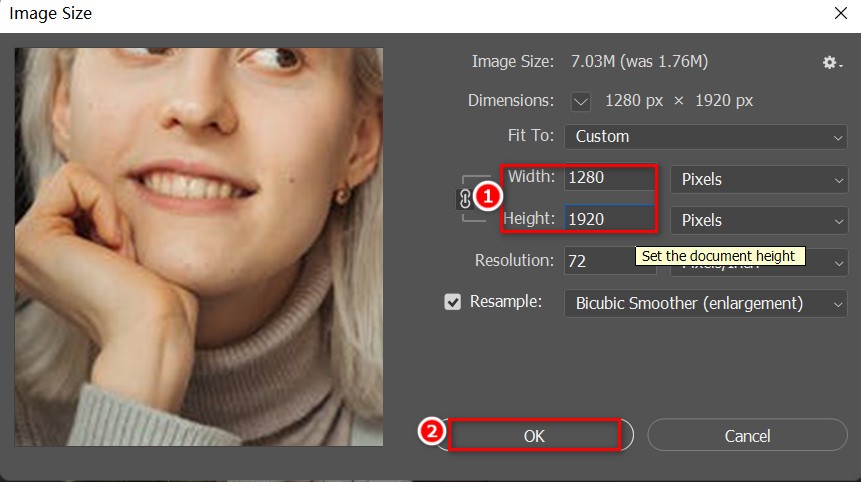
Step 4. You can enter the new Width and Height for your image. If you want to make it much larger, you can try doubling or tripling these numbers. But don't go too big, or the image might look blurry. When it looks good to you, click OK to save the changes.
Method 3. Use Neural Filters in Photoshop
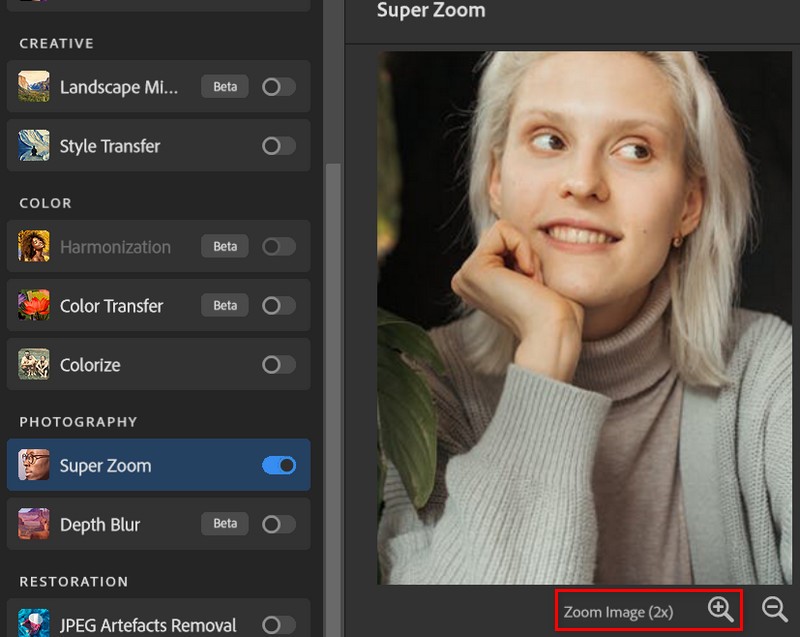
Neural Filters in Photoshop leverage advanced AI technology to enhance images, including improving resolution. The Super Zoom filter is specifically designed for enlarging images, making it ideal for larger prints or enhancing details in digital artwork.
However, Super Zoom doesn't sharpen images, so it's best suited for photos with rich details and textures, such as landscapes or intricate portraits. For sharper results, consider combining it with additional sharpening tools.
Here is how to use it:
Step 1. Open Photoshop and upload your image.
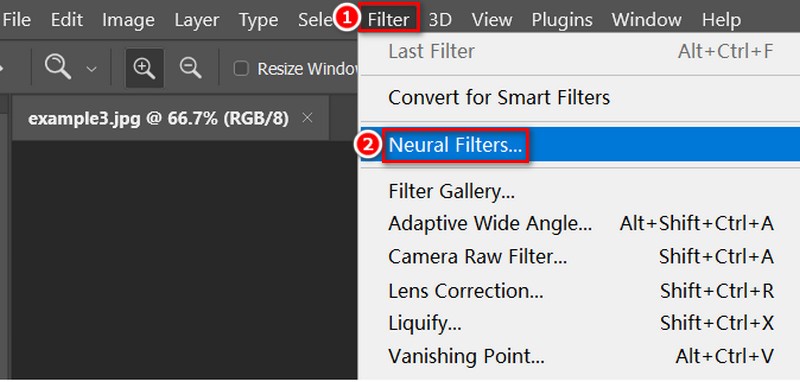
Step 2. Click on Filter in the top menu, then select Neural Filters. This will open the Neural Filters panel.
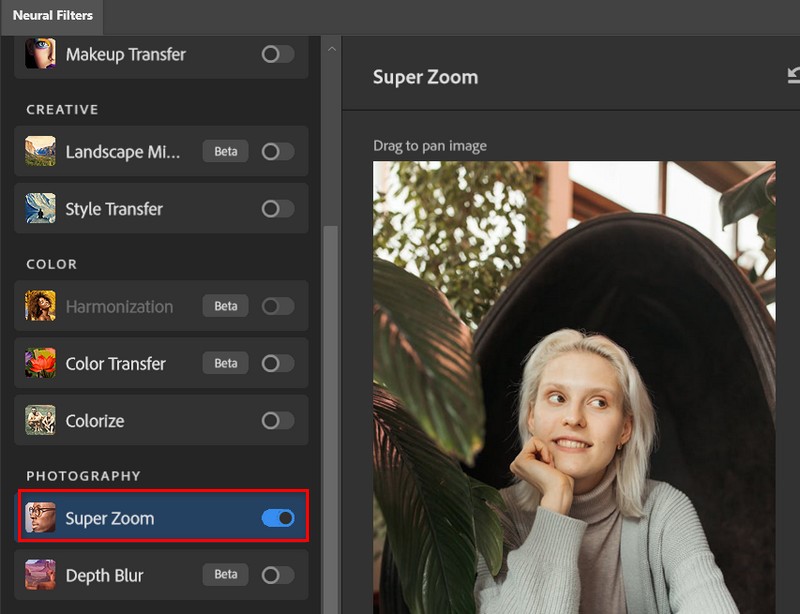
Step 3. In the Neural Filters panel, look for the Super Zoom filter. Toggle it on to enable the filter.
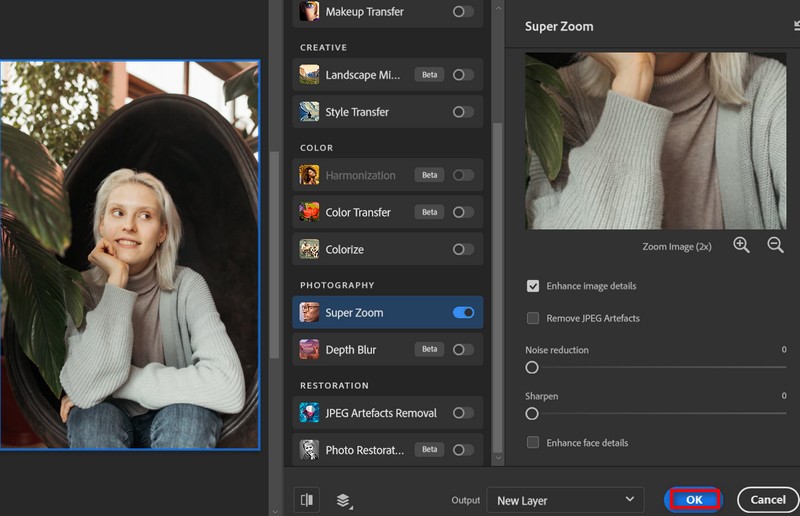
Step 4. Once Super Zoom is enabled, you'll see options to adjust the zoom level. Adjust the zoom percentage to decide how much you want to enlarge the image.
Step 5. After making your adjustments, you can preview the changes in real time to see how it looks. Click OK to apply the Super Zoom filter. Photoshop will process the image and open the upscaled version.
Tips: Achieve the Best Results Picture Resolution Increasing
While the three methods mentioned earlier can effectively enhance image resolution in Photoshop, keeping the following tips in mind will help you achieve optimal results:
• Avoid Over-Resizing: Limit resizing to 2-3 times the original size, especially for low-resolution images, to prevent pixelation or blurriness.
• Enhance Clarity After Resizing: After enlarging the image, use tools like Unsharp Mask or Smart Sharpen in Photoshop to restore lost sharpness and enhance details.
• Leverage Advanced Plugins: Consider using plugins like Nik Collection or Topaz Gigapixel AI to further improve quality and achieve professional-grade results.
By combining these techniques with the right tools, you can enhance image resolution effectively while maintaining clarity and detail.
FAQs About Increasing Picture Resolution in Photoshop
Does increasing resolution always improve image quality?
Increasing resolution can make an image look sharper, but it doesn't add detail to a blurry or pixelated image. It's important to remember that just increasing the number of pixels doesn't fix issues that are already in the image. Tools like Picwand AI Image Upscaler that are upscale and enhanced at the same time can be useful, but they still work within the limits of the original image's quality. So, while they can help improve things, they won't perform magic on a poor-quality image.
What is the best format for high-resolution images?
TIFF and PNG are ideal for high-resolution images in professional uses, as they preserve quality without compression. RAW is best for photography, capturing the most data for editing. For web use, JPEG balances resolution and file size, though it's lossy.
Can Photoshop upscale low-quality images perfectly?
Photoshop can upscale low-quality images, but it can't make them perfect. It offers tools like Preserve Details 2.0 to improve sharpness, but significant enlargement or pixelation may still produce unsatisfying quality. AI tools like Picwand AI Image Upscaler can often deliver better results for upscaling because they also enhance the whole picture at the same time.
Bonus: An Alternative for Increasing Picture Resolution
Though Photoshop is very powerful in image editing, it might be too complex, challenging, and time-consuming for non-professional users. So, how can we increase the resolution of an image without Photoshop on Windows 10, or MacOS? Well, what you need is a faster and more straightforward tool with higher quality. Picwand AI Image Upscaler is exactly what you need! It's a free online image upscaler that utilizes AI technology to increase photo resolution without compromising its original quality.
Features:
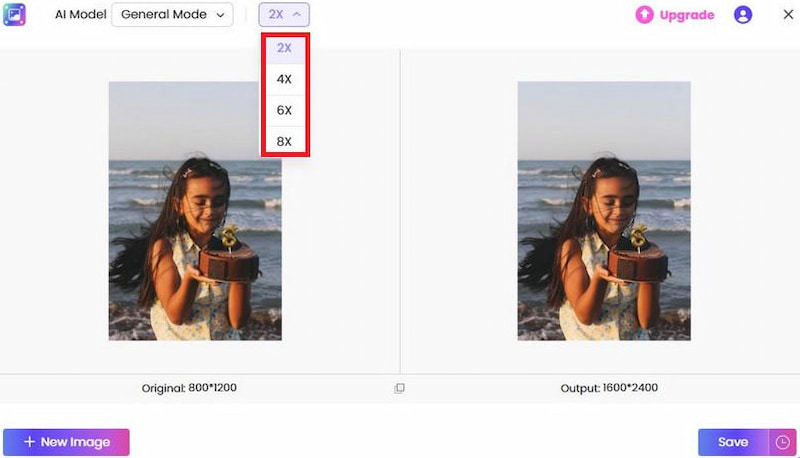
• Upscales photos effortlessly by 2×, 4×, 6×, or even 8× with just a click, no complex settings required.
• Boosts resolution up to stunning 4K, delivering exceptional clarity for both digital and print needs.
• Enhance photo quality while upscaling, ensuring sharper details and vibrant visuals without manual adjustments.
• Batch processes multiple images at once, saving time and effort compared to Photoshop's step-by-step editing.
• Accessible across devices, including mobile, tablet, and desktop—work on your photos anytime and anywhere.
Here is how you can increase picture resolution with Picwand AI within three steps:
Step 1. Open Picwand AI Image Upscaler and click Upload a Photo.

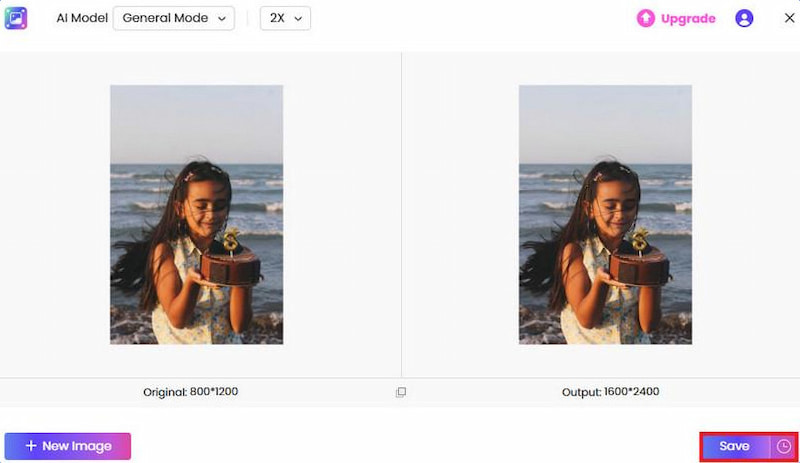
Step 2. Then, click Start. The image will be automatically upscaled to 2×. You can compare all the details by dragging the movable line in the middle.
Step 3. Click Download at the top-right to save the upscaled image.
Quite simple, right? Compared with Photoshop, Picwand is more convenient to use. Moreover, this free image upscaler increases your photo resolution without requiring any advanced photo-editing skills or downloading any software because it's web-based!
Conclusion
We have covered three commonly used solutions to increase the resolution of pictures in Photoshop, including Preserve Details 2.0, Bicubic Smoother, and Neutral Filters. Although Photoshop is the top choice for professionals, its complexity and learning curve remain a big barrier for beginners, which is why we need Picwand AI Image Upscaler, a free online tool that provides an easier option for increasing your photo resolution effortlessly and quickly. Give it a try and see which solution works best for your image upscaling needs!


AI Picwand - Anyone Can be A Magician
Get Started for Free