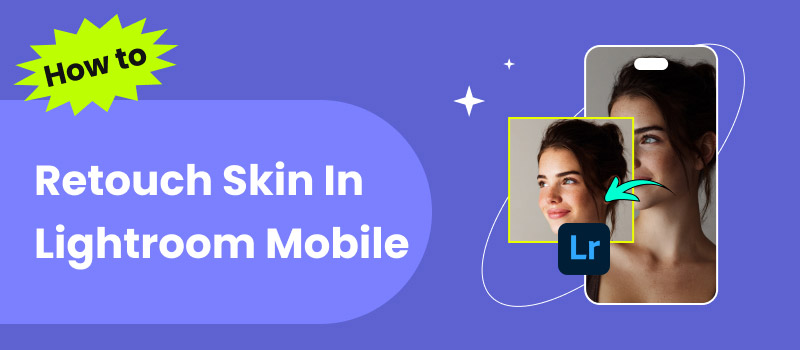
How To Retouch Skin In Lightroom Mobile Like a Pro on Phone
Lightroom Mobile is a powerful photo editing app designed for smartphones. It allows you to edit on the go with professional-level tools. Among its most popular and widely used features is the ability to retouch or smooth skin. It helps enhance portraits by reducing blemishes, softening textures, and creating a natural look. With selective editing tools and detailed adjustments, it allows you to precisely control how much smoothing is applied. It ensures results remain realistic and professional. In this post, we will teach you how to retouch skin in Lightroom Mobile. This way, you can easily refine your portraits directly from your device. By the end, you will master skin smoothing in a way that looks subtle and natural.
Contents:
Part 1. How to Retouch Skin in Lightroom Mobile
Lightroom Mobile offers several editing tools, including selective adjustments for smoothing skin textures. If you want to go beyond the starter tools, upgrading to the premium plan expands these features. This smooth skin app is ideal for on-the-go editing, helping you reduce noise, soften imperfections, and minimize minor blemishes and fine lines. Additionally, it includes a healing brush for easily removing unwanted elements and achieving professional-quality results.
Here’s how to retouch skin in Lightroom mobile:
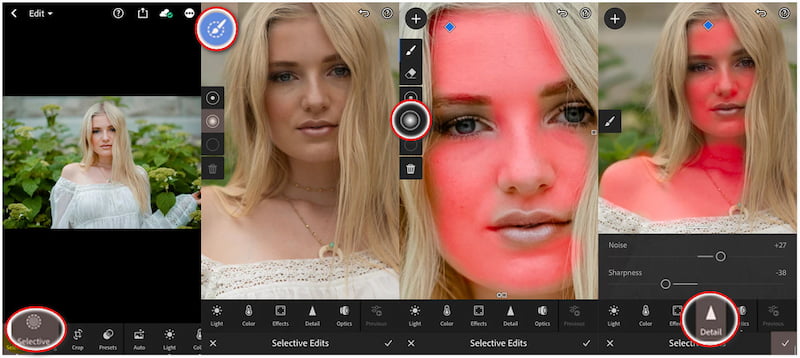
Step 1: Open Lightroom Mobile and add the portrait image you’d like to smooth skin. Once the photo is loaded, use your fingers to zoom in on the area of the skin that needs smoothing. This action helps ensure precise adjustments, especially on the face.
Step 2: At the bottom of your display, tap the Selective Edits option. Tap + to create a new selective adjustment and select the Brush tool from the tools. On the left navigation, different brush options will appear. Select the Circle Soft-Edged Dot tool for a natural smoothing effect on skin.
Step 3: Use your finger to gently paint over the areas of skin you want to smooth. As you brush, the selected areas will appear covered in red. This red overlay is a mask preview, showing where your edits will be applied. Avoid brushing over the eyes, lips, and nostrils to keep them sharp.
Important Note: You’ll notice a small diamond appear when brushing, which represents your mask. If it turns blue, it means the mask is selected for editing.
Step 4: With the mask still active, go to the Detail panel and adjust the sliders as follows:
Sharpness: -40 This reduces detail to soften the skin texture.
Noise: +30 This smooths the appearance even further by blending tones.
Once satisfied, tap the Check Mark to save the adjustments.
Lightroom Mobile brings professional-quality photo editing directly to your mobile device. It offers powerful tools and intuitive touch-based controls to enhance your images right away. Before saving, zoom out or view it on a bigger display to ensure it doesn’t appear overdone.
Part 2. Best Alternative to Lightroom Mobile
Undoubtedly, Lightroom is a powerful photo editing app. However, many users want a real one-tap solution for retouching skin and facial enhancement. That’s where Picwand AI Photo Editor steps in as the best alternative. It is a comprehensive, AI-powered editing application compatible with both Android and Apple devices. It requires no manual masking and adjustments for skin smoothing.
Not to mention, Picwand AI Photo Editor is packed with twelve AI image tools. This includes the AI Skin Retouch, Age Filter, Object Remover, Image Colorizer, and Photo Restoration, among others. The AI Skin Retouch tool intelligently removes blemishes, balances skin tone, and sharpens details for a more refined appearance. This allows you to achieve professional-quality results with just a single tap.
Why Choose Picwand AI Photo Editor:
• AI-powered skin retouching means less manual editing.
• Produces natural, professional-quality portraits in just a single tap.
• Efficiently covers imperfections such as blemishes, acne, scars, and wrinkles.
• Uses the newest and latest AI image processing technology to smooth skin.

Step 1: Start by obtaining the Picwand AI Photo Editor from the Google Play or App Store. Be sure to get the correct version for your mobile device, as it’s available for both Android and iOS. After installation, launch the application on your device.
Step 2: On the main interface, select the AI Skin Retouch tool from the list. From there, browse your Gallery/Camera Roll and select a portrait photo you’d like to retouch. Select a clear, front-facing portrait with good lighting for optimal results.
Step 3: After uploading your photo, the app’s AI engine immediately begins analyzing the portrait. During this process, the app enhances color, balances tone, sharpens image details, and improves image quality. To speed up processing, you can tap Enable Acceleration.
Step 4: Within seconds, the app presents a side-by-side comparison of the original and retouched photo. This preview helps you evaluate the differences before saving. If satisfied, simply tap the Download button to save the final image.
Picwand AI Photo Editor provides natural-looking skin retouching results without needing manual edits. Its AI Skin Retouch tool detects facial features, balances tones, removes blemishes, and sharpens details automatically. In addition to skin smoothing, it also enhances the detail and upscale images to 4K, delivering outstanding retouched versions.
Part 3. FAQs about Retouching Skin in Lightroom
How to save photos from Lightroom mobile without losing quality?
To save photos from Lightroom Mobile without losing quality, export them at the highest resolution. After finishing your edits, tap the Share button and choose Export As. From here, set the File Type to JPEG for lossless quality. Also, ensure the Dimensions are set to Maximum Available with Quality at 100%.
How to fix blemishes on Lightroom mobile?
Lightroom Mobile features a Healing Brush tool that enables quick and precise correction of blemishes. To use it, tap Selective Edits and choose the Heal tool. Tap or brush over the blemish, and Lightroom will replace it with a sampled area of surrounding skin. You can adjust the size, feathering, and opacity of the brush to blend seamlessly.
How do you increase quality in Lightroom?
Increasing quality in Lightroom enhances the detail and reduces unwanted noise in your photos. To do so, go to the Detail panel, where you’ll find options for Sharpening and Noise Reduction. Adjust the sharpening sliders to bring out fine details. Additionally, ensure that your photo is edited at its highest resolution and exported with maximum quality settings.
Conclusion
Mastering how to retouch skin in Lightroom Mobile lets you enhance your portraits with natural-looking results. With the selective brush and detail adjustments, you can smooth skin naturally while preserving important features realistically. However, while Lightroom is great for precise manual editing, it requires time and practice to master. For a faster and more effortless solution, try Picwand AI Photo Editor. Its AI Skin Retouch tool automatically detects and smooths skin. Additionally, it balances tones and removes blemishes in just one tap.
AI Picwand - Anyone Can be A Magician
Get Started for Free